| Now how
do you sew the strips on?
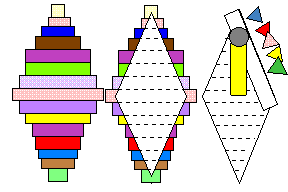
The basic idea here is to lay a fabric strip on the foundation, sew it down, flip it over, press it nice and flat, then lay on the next strip, sew it down and continue until the whole paper is full of fabric strips. STEP 1: Take you first strip and lay it in the center of the diamond paper foundation. You may wish to pin the first strip in place. (Or a litle glue stick works wonders!) NOTE: Line up the edges you are sewing so the strips lay straight. Hold the strips firmly as you sew but so they don't gather up but don't stretch your strips as you sew or they will ripple. If you have a long strip of fabric, and use it in the middle, you can use the shorter cut off piece on the shorter point area of the diamonds. |
Note:
Get your machine ready. Set your machine to sew at about
16 stitches to the inch as that will make it easier to remove the paper.
Check and be sure you are getting a good tension on both sides of the fabric.
Clean bobbin area and perhaps even put in a new needle if you haven't changed
it lately.
|
| STEP 2: Lay
on the next strip, aligning edges. Sew across the top edge of the strip
using a 1/4" seam allowance.
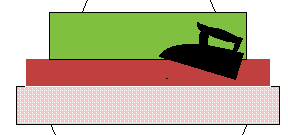
NOTE: A good tip for any quilt project is that after you sew any seam, but before you flip the strip over, press the stitching you just made. This helps to set the stitching and makes it easier to press from the top. STEP 3: Flip the just sewn strip up and press. You can finger press but an iron gives you a nice flat seam. Make sure you don't have any little pleats in the strip when you press. |
. 
|
| STEP 4: Add the third strip as the first one. Sew across, flip up and press. Now, this wasn't nearly as hard as you thought it would be, is it? | 
 |
| STEP
5: Continue to add strips and flip
and press untill you do one half of the diamond. Then go on and do the
other half in the same manner. Do all eight diamonds.
STEP 6: Give it all a good final press, then flip the diamond over so the paper is facing up. STEP 7: Use a rotary cutter and ruler (or scissors if you prefer) and carefully trim all fabric beyond the paper. (CAREFULLY!) At this point, I would lay the master large diamond template on the sewn strips template, and make sure that the piont is still a true 45 degree angle. There may be some stretching from the sewing and your point will distort. If it did distort, trim it up to a true 45 degree angle or you will have a big bump in the middle of your star when you sew it all together. |

Step 5...................Step6...................Step7 |
| STEP 8: The final step: Sew a line of stay stitching around each block just inside the 1/4" seam allownace while the paper is secure. If your paper tears away while setting in the corner squares and triangles, the stitching will hold the fabric in place and keep the bias edges from stretching. | NOTE: I found that if I removed the paper from that stay-stitching to the edges of the diamond, (in the seam allowance area), it was easier to sew in the squares and triangles. You be the judge of what you want to do. |
| And there you have it! It's not magic, it's just a lot of fun to see your paper take on such a colorful life. | Next you want to go to the step: How to figure the background squares and triangles. |
 You
can do all the diamonds at once, or do one at a time. If making them all
the same and if using long strips, it would be easy to just string sew
all the diamonds at once using one strip until you ran out of it. If using
scraps, it may be fun to just do one at a time and see what *happens*.