 Power Antenna installation in a fourth
gen Camaro
Power Antenna installation in a fourth
gen CamaroPower Antenna installation in a fourth
gen Camaro
After searching the net for someone that did this job proved unsuccesful, I decided to make my own page about it. My Camaro is a 2000 year but I believe this will work on Camaro's from 95 and up. Here is the Parts list:
GM power antenna
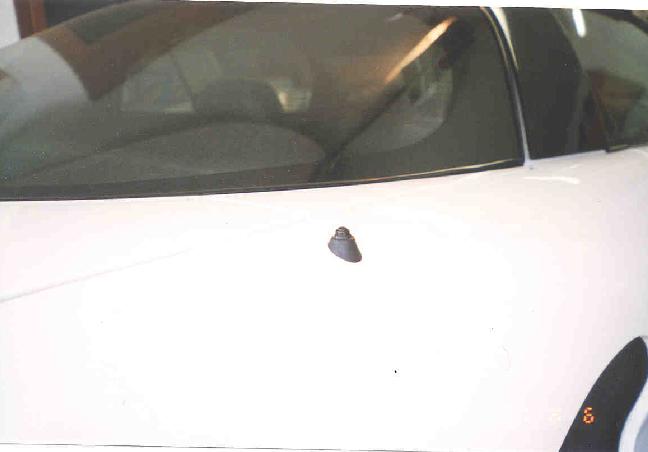
The GM factory power antenna is the best way to go for many reasons. For one thing the rubber antenna grommet on the rear quarter fits the factory antenna just right. An aftermarket unit will probably be too small. The electrical connection is easy also when using the stock power antenna. Here's a picture of my Camaro with the Antenna down.
Installation
Replacing the antenna itself is very easy. Just remove the spare
tire cover and one screw and the antenna wire connection. The new
antenna should line up with the factory hole and fit snug in the
rubber fender grommet. The drain tube may need to be lengthened
to reach the hole at the bottom for water drainage. Next remove
the stereo plastic bezel - no crowbar required, just gently pull
and it should come off. The factory stereo is then easily removed.
For an aftermarket stereo the antenna wire signal wire is already
known. For the factory Stereo refer to schematic here. The factory stereo is the same
for Camaros and Firebirds, as is the stereo connector. The
antenna signal wire just needs the motormite
connector plugged into the empty cavity of the stereo connector.
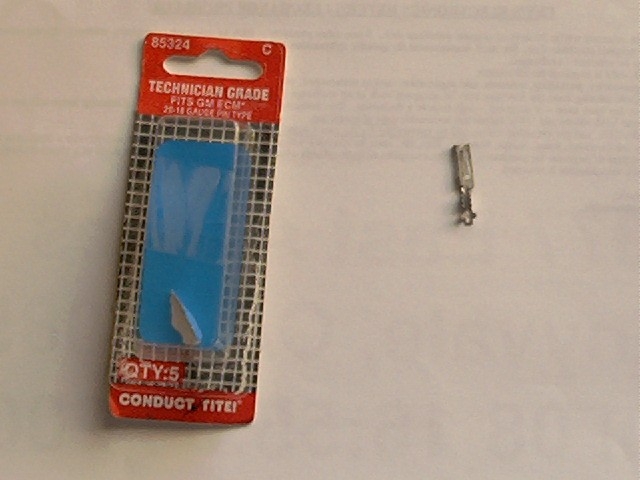
The right crimping tool for the GM ECM type connector is helpfull
but it should be manageable with a pair of needlenose pliers. The
factory color for the antenna signal wire is pink. After
connecting the antenna wire to the stereo run the wire under the
carpet and under the passenger side plastic cover to the antenna.
For the power wire, I ran a wire off of the factory amp which is
right next to the antenna. There should be 2 orange wires right
next to each other going to the amp connector. See the amp
connector schematic here. This is 12v
power fused. Just splice in a 1-2 foot piece of orange wire. This
should be the only part of the factory wiring that needs to be
cut into. For the ground wire I used a ringlug from the antenna
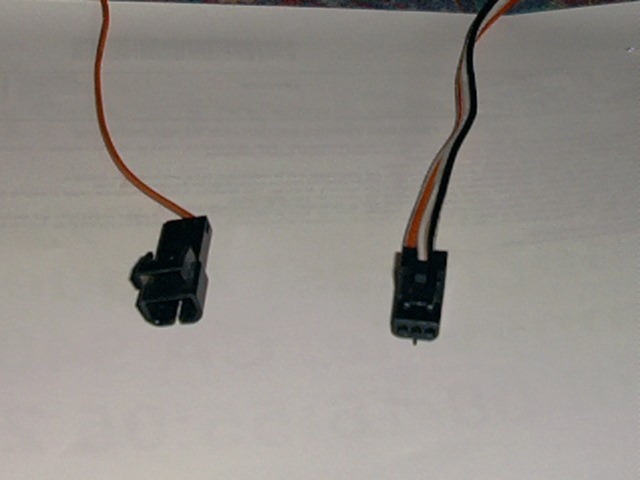
mounting screw with the black wire. The connector on the factory
antenna is a GM 3pin metripack type connector. One could simply
cut it off and splice in the wires and be on your way. But for
the "factory look" the right mating connector is the
way to go. The trick is finding one but here is a tip. GM uses
this 3 pin connector whenever a 3 wire connection is required on
all late model (95 and up) vehicles. One trip to the wrecking
yard and I found 3 connectors. One was on a Buick or Olds in the
headliner area. Another one was found under the dashboard. I have
included a picture of it to help
identify it but again GM uses them all over the place. The part
number for the connector is 12064759 and 12064758 but good luck getting GM's electrical division (Pioneer
signal and power) to sell you one of them. After acquiring
the mating antenna connector the wires may be soldered or crimped
into the 3 positions as shown here.
After verifying the antenna operation the stereo and bezel may be
put back together.
