
Install Cards
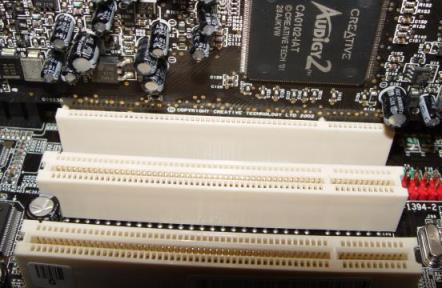
We need to install the AGP and PCI cards that we are going to use. These can include video, sound, network interface, modem cards, and a whole list of others, depending on our individual needs. This is a very simple process; just slide them evenly into their socket, and screw them into the case.
Install Drives
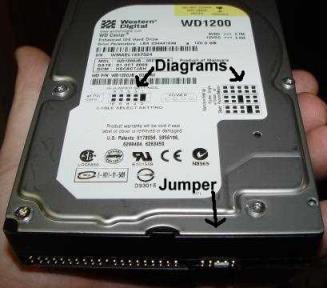
Now we need to attach our 5.25” and 3.5” drives, but before we can do that we need to set the jumpers on everything but the floppy. On most drives you have three options: master, slave, and cable select. If your drive is at the end of the IDE cable it is the master, if it in the middle it is the slave, if you don’t want to mess with it just set the jumper to cable select and the motherboard BIOS will set them automatically to their positions. The downside to setting the jumpers to cable select is that this can sometimes cause some errors, so if you can, set them to master/slave. In order to set the jumpers, we first need to know where they go. There should be some diagram in the instruction manual, otherwise there should be some form of designation on the drive itself, usually MS, SL, and CS.
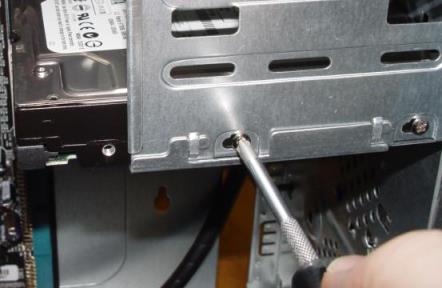
The best way to install these drives is to slide them into place, one at a time, then insert the four retaining screws but don’t tighten them just yet.

After you get all of your drives in, you’ll want to get them aligned nice and pretty like, so that none of them stick out farther than the others. Work your way from the top to bottom or vice versa tightening the screws for each drive as you go.


Do the same thing for the 3.5” drives, like the floppy and hard drives. If you have the available space, it is a good idea to leave some space around the hard drive(s), i.e. don’t stack them. They tend to heat up quite a bit during use and if they get too hot it will drastically reduce their life.