Mount Motherboard
Now that the motherboard is properly configured we need to actually attach it to our case, but before we can do that we need to open our case. There are many different case designs, but with most all that you have to do is pull 2 or 3 screws from the rear of the case, on the door to be removed, then slide the door back and off. If you do not have the screws in the back on the door, you may have to remove the front or top panel first, feel around and look for screws. Once we have the case open, the first thing that we need to do is to install our spacers. Computer cases come with many holes for spacers to accommodate different motherboards, but we have to be careful to only install spacers in the places required by our motherboard, were we to put spacers in unnecessary places then there is a very good chance of permanently damaging our motherboard. The easiest way to find the required holes is to set our motherboard close to the case and simply compare the two.
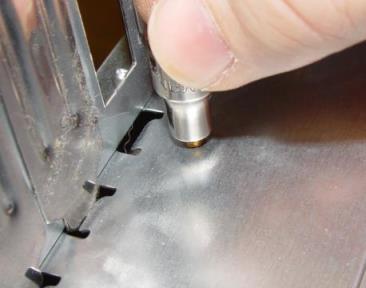
Use a 3/16” socket or nutdriver to screw the spacer in and gently tighten with a ratchet, being careful not to strip the threads.
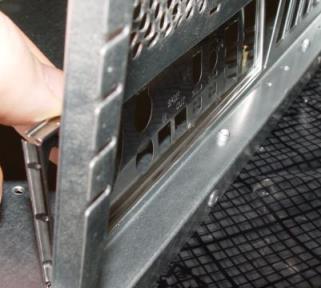
Now we need to install our I/O connector plate. This is done by simply snapping it into place, usually from the inside of the case.
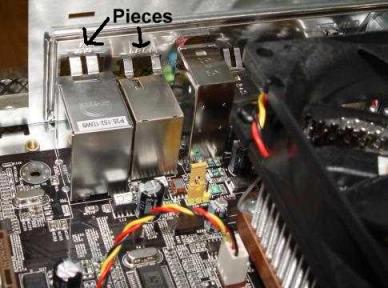
What we need to do now is to secure our motherboard to our case. If your I/O connector panel has some little metal pieces sticking out into the center of the case in order to make contact with the motherboard, aligning the motherboard can be a little tricky. The easiest way to do this is to tilt the motherboard below these little suckers, then carefully push them up with the motherboard while aligning it to the spacers. Finally just secure the motherboard to the spacers with the accompanying screws.

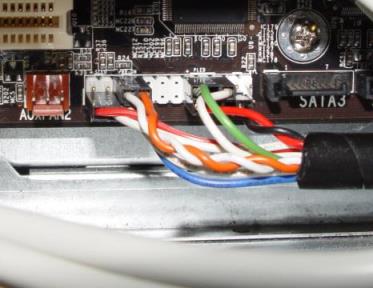
Now we need to connect our front panel switches and indictor headers. These are the connections to the on/off and reset switches, speaker, and hard drive activity and power led’s. Most motherboards place the connections in different orientations; just follow the diagram included with your motherboard.