Wilson's C5 Corvette Bra Page
mods home
vette home
home
#1) There are three bras available for the C5.
Speed Lingerie,
Colgan &
Custom GM.
The Speed Lingerie does not cover the emblem, and has a version
which covers the front license plate with clear plastic. The Colgan bra is
nice if you like to cover more of the car. I chose the Custom GM
because it shows the front plate, doesnt cover too much of the hood,
and has its own color emblem. Speed Lingerie comes in different
colors and is more than twice as expensive, but since I wanted black
anyway, it wasnt worth it. Note: Eckler's also has a Wolf mask and
a Covercraft mask with emblem, but i still prefer the Custom GM for the
look of the hood piece. However, i have heard that the installation
of the hood piece can do damage to the hood liner over time.
#2) The supplied instructions leave something to be desired, so i will try
to improve upon them here. The hood piece goes on easy. For the nose
piece, start with a 7mm (or 9/32) socket. Start the car and turn the wheel in
so you have access to the 3 fender well screws. Turn the wheel the other way
and remove the closer lower fender well screw. Removing extra screws gives you
more room to work with. When the wheel is in you can do one sides outer screws
and the other sides inner screw, then turn the wheel and do the opposite.
Pop out the clips for the 1st & 3rd screws. To make room use a block of wood
between the body and fender well wall to hold the two panels apart.
Use needle nose pliers to remove the clips so you dont lose them in the car.
If you do lose a clip, turn the wheel out and take out the 2 other fender well
screws and 2 screws under the nose. Then you can pull the plastic down enough
to get the lost clip. I also removed one screw from the air dam so that i could
see.
(alternative method: Use a magnetic retriever, Craftsman magnetic
retriever about approximate 18 inches long. You can gain access to the
area by opening the hood, and turning the knob to deploy the head lights.
Once the head lights are fully deployed, you will have enough access to
slide the "magnetic retrieve" between the headlight bezel and fender. Slide
the retriever down to the area/bottom and "fish" around until you snag the
wayward part.)
#3) Once the clips are out you can push the rubber nuts into the body
holes. The supplied snap screws tighten into the rubber nuts, even though
the nuts turn. I am not sure how the instructions intend you to prevent this.
#4) Once both sides are snapped in you have to bend over the top fastener.
Unsnap the top fastener and use plyers to bend a lip over into an
"U" shape. Now push the end of that U in between the body and fender well plastic.
It doesnt seem it will go in, but it will when forced. It goes in above the
piece of body you were working with in step #3.
#5) Next remove the 1st, 3rd & 5th screws from below the nose. The instructions
say to do this step last, but i believe it will be better now so that the bra can
be made tight in the last step. The screws will go in hard because they are a
different thread than stock.
#6) Bend over the upper tabs into U's and install them around the body. Make the
U's as close to the vinyl as possible so that the bra is tight.
#1) Doesnt fit exactly right, but get out the hair dryer and make it work!
Clear protective shield under bra to protect paint, from Griots
#1) This is
3M Scotch 300LSE Hi Strength Adhesive. Griots sells it with a positioning
spray which keeps it from sticking before you are ready.
#2) It doesnt look good by itself, but i planned to keep the bra on so you dont see
it.
#3) After 6 months i decided i didnt want to keep the bra on always so i removed the tape.
It was easy to remove with a hair dryer and did a wonderful job of protecting the paint underneath.
If two strips are RIGHT next to each other they do keep out dirt between them. I would use them
again on an area that they cover completely so that they are not noticable.
Air Dam apart to get clip

Damn clip!

Wood to seperate panels. Notice that clean wheel!

Side

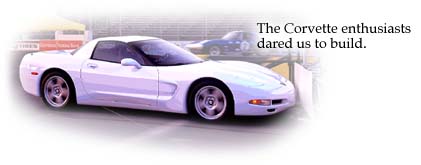
Final Mask


Mirror Bras

Driver Side

Back

Driver's side with one piece of Clear Protective Shield

Driver's side with upper piece of Clear Protective Shield

Passenger's side with lower piece of Clear Protective Shield

Front air duct opening


This page hosted by  Ā
Get your own Free Home Page
Ā
Get your own Free Home Page