I started with the rear. First, bleed as much of the fluid out as you can. Slip your 8mm wrench over the bleeder valve and attach a length of plastic hose. Run the hose into a jar or pan. Open the valve a bit and pump out the fluid by depressing the brake pedal.

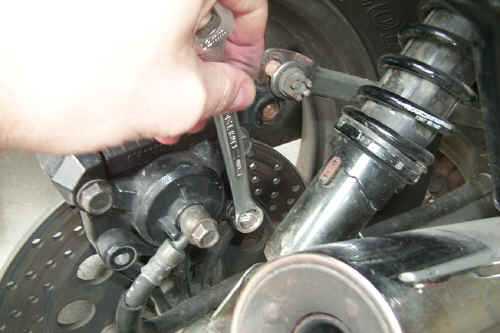
Remove the cotter pin and 14mm bolt from the "torque link" bar. You will need to hold one wrench on the back side to keep it from spinning (visible below).

The rear caliper is made up of two halves, which must later be separated. Before you remove the caliper, partially loosen the two 14mm bolts that hold the two halves together. Once it's off the bike, it's nearly impossible to break loose the bolts since it's nearly impossible to get the leverage with nothing to hold the caliper from spinning around your table. For now, you just want to "crack" the bolt.
Here's the first bolt.....

Here's the second bolt.....

Slightly loosen the 12mm brake line bolt. Just enough to "crack" it, but not enough to have fluid start pouring out.
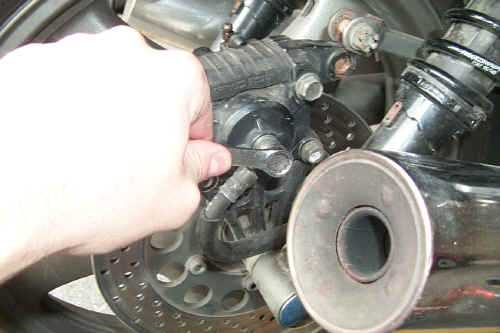
The caliper is then held on by two 12mm bolts. Here is the first one....

and here is the second one.....
Remove the caliper and take off the banjo bolt. Be aware that more
fluid is about to pour out of the line and from the caliper itself. Be
careful to have a drain pan available, and keep the drippage off the bike!
I tie one or two plastic baggies over the brake line to keep dust and junk out of the
system, while preventing any remaining brake fluid ooze from dripping in the
bike. If possible, you may want to some how tie or prop the line away from
painted bike surfaces, just in case the baggie leaks (which mine
did). There's a picture in the front caliper removal section.

Wipe off what ever fluid you can, and put the caliper aside for now.
Back to main brakes page
Rear caliper removal
Front caliper removal
Rear caliper disassembly and repair
Front caliper disassembly and repair
Installation and testing