BATTLE REPORTS - INTO CUSTARD TERRITORY


Into CUSTARD Territory

Having played games with a fairly level setting for some time we finally decided it was time again to include some hilly features in a game. The idea was to have someone defending a hilltop to be gloriously steamrollered by waves of attackers. Needless to say, it didn't work out quite that way...

The Location:

Soeliland, a remote village at the edge of the territory controlled by CUSTARD.

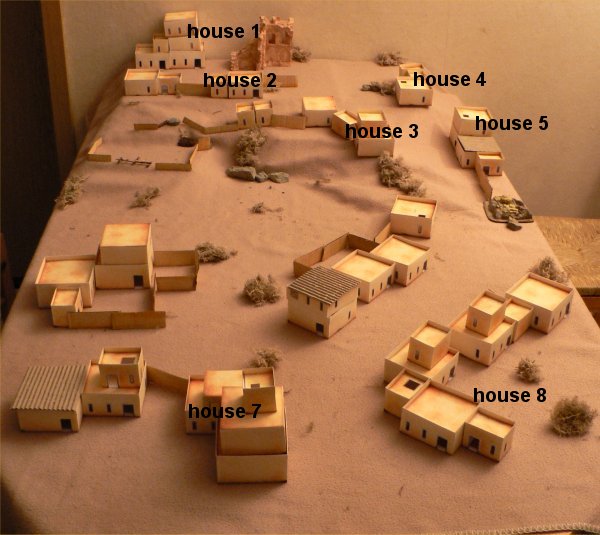
The village is essentially divided into two parts, one lying on higher ground and dominating the other. The main road, which is one of the main roads into CUSTARD territory, does not run straight up the hill, but instead sweeps around to avoid the most difficult territory; there is an old ruin being positioned where there is a sharp bend in the road. Particularly the complexes of houses 3, 4 and 5 dominate the road as it runs up into the higher part of the village.

The village is held by a CUSTARD force which very recently has been substantially reinforced by an armoured column. Also, a US armoured column retreating from an abortive hunt for terrorists in the mountains has entered the village just the day before and occupied defensive positions. While there seems to be a mutual understanding between the US commander and the local CUSTARD CO, the two forces do not coordinate their defence efforts (well, that was the plan; we learnt the hard way that neither the US forces commander nor the CUSTARD queen can be even remotely trusted to that respect...).

Of course, PLAoSS could have none of this all - a sizeable force was gathered in order to clear the village, supported by the greatest concentration of tanks the PLAoSS was able to field to this day. In fact, this force was so large that it allowed for two commanders, who while being instructed by the PLAoSS CinC to work closely together somehow managed to foul this up every now and then...

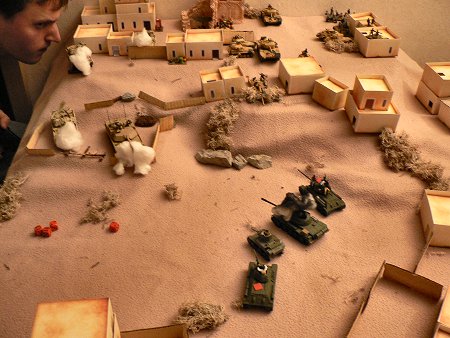
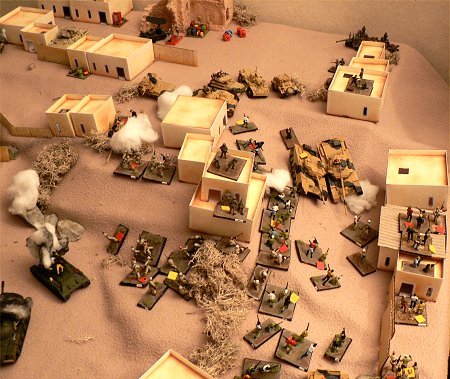
Below is the village; PLAoSS entered the village from the lower side, while CUSTARD and US army positions were located in the upper part of the village.

The Objectives:

The overall objective for the two PLAoSS commanders is a simple one - gain control over the road leading up to the upper part of the village; clear the area in front of the ruin and prevent any remaining enemy forces from blocking the road. CUSTARD obviously has to prevent this, and the US commander decided to join forces with them.


The participating forces

1. CUSTARD
2. PLAoSS
3. US Army

Force HQ +2

Platoon

HQ +2

3 Militia squads (green)

1 PC +1

3 rifle team

1 MG team

1 AT squad (green)

1 PC +1

3 RR guns

1 engineer squad (elite)

1 PC +1

2 engineer team

armoured group

heavy tank section

1 Centurion +1

2 Centurion

tank section

1 Sherman +1

2 Sherman

recce section 1 Saladin +1

1 Humber

2 Scorpion

artillery group

heavy AT section

1 100mm ATG

FG section

2 5.5in FG

1 Spotter

pillbox

emplaced Sherman MG

Force HQ +2

Platoon

HQ +2

3 Militia squads (green)

1 PC +1

3 rifle team

1 MG team

1 AT team

Platoon

HQ +2

3 Militia squads (green)

1 PC +1

3 rifle team

1 MG team

Platoon

HQ +2

3 Militia squads (green)

1 PC +1

3 rifle team

1 MG team

1 AT team

Platoon

HQ +2

2 Infantry squads (average)

1 PC +1

2 rifle team

1 MG team

1 AT team

1 terrorist squad (elite) 1 PC +1

1 rifle team

1 MG team

1 AT team

artillery group

mortar section

2 81mm mortar

2 Spotter

gun section

1 105mm field gun

1 Spotter

armoured group

command tank +1

tank section (green)

1 M-48 +1

3 M-48

tank section (green)

1 T-55 +1

1 M-47 +1

technicals

3 technicals

Force HQ +2

infantry force

2 Infantry teams (average)

1 PC +1

1 rifle team

1 MG team

1 Bradley

1 Support team (average)

1 PC +1

1 engineer team (elite)

1 AD team

1 AT team

tank support

1 Abrams

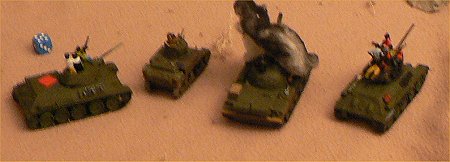
The PLAoSS had a distinct advantage in overall troop numbers. However, already a quick glance at the hardware available to US forces and CUSTARD showed that CUSTARD was in for a really rough ride - 1 Abrams, 3 Bradley and 3 Centurions in a defensive posture were quite a force to be reckoned with. For that reason PLAoSS was allowed to have access to a highly effective CAS aircraft, a Su-25 Frogfoot, a marvellous piece of Soviet engineering, but judge for yourself:

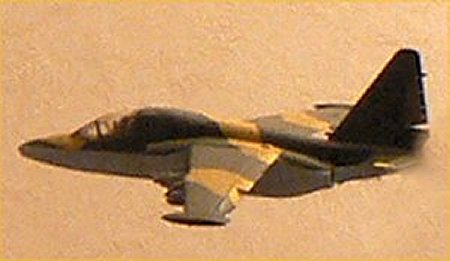
Su-25 under PLAoSS control

Man, did we believe in this piece of equipment. "It will kill the battlefield." "That'll whack all these tanks." "The Abrams will be blown up right up to the ceiling." "If in doubt, we'll Napalm the whole table." - Well, as they say, there is no end to self-delusion...


Phase I: The setup

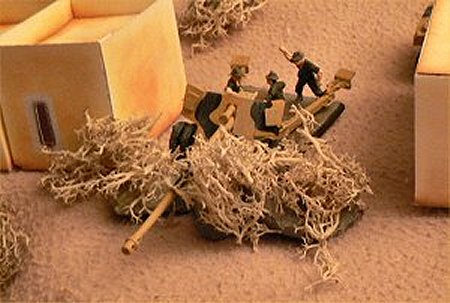
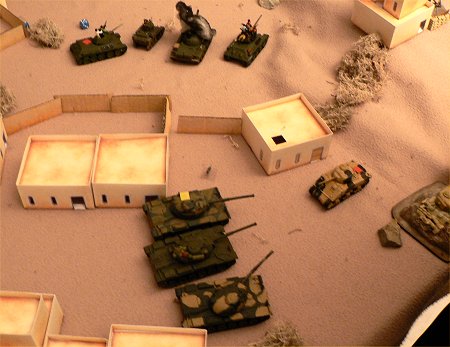
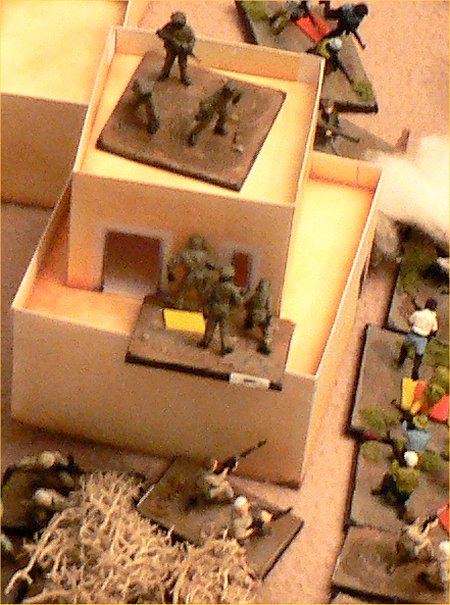
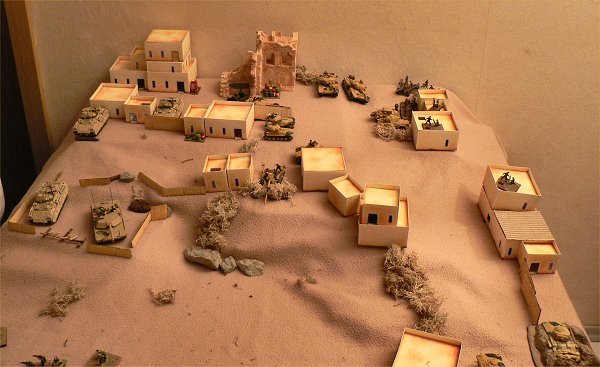
Below you can see the US forces and CUSTARD assets deployed in the upper part of the village. Note that the Abrams occupies quite a commanding position, with a suitable killing ground in front and below of it. CUSTARD armour is mainly kept at the back, ready for any counterstrikes, with only the Shermans deployed on forward positions. The Sherman pillbox in the lower right corner was to play an important role in the battle.

PLAoSS entered the village from the southern side and began setting up mortar and artillery positions behind houses 7 and 8.


Phase II: The tank battle

Having entered the village and done a few recce actions it became pretty - or rather blindingly! - obvious that the Abrams would become a serious problem, being able to fire pretty much into anything trying to move either along the road or across the open area towards house 3. So what to do

Quickly a plan was made up - with enough artillery available it should be possible to screen the Abrams with smoke (apparently the thermal imaging equipment didn't function; at least the US CinC didn't think of it....), and then its position was to be swamped with a massed tank attack.

Well, good plan on paper.

It had three major shortcomings:

One, somehow it escaped our immediate attention that killing an Abrams with a head-on shot isn't exactly easy, particularly not if the hottest gun in your inventory is that of an old T-55 which has the nasty tendency of never ever hitting anything. Simply moving onto the open and firing at it wasn't going to produce suitable results.

Two, focussing totally on the Abrams proved to be a bad idea simply ecause there were other people up on that hill bent on doing harm to PLAoSS tanks...

And three, shrouding the Abrams in smoke was a nice move - but it also prevented the tanks from actually shooting at it.

So much for good plans. Not surprisingly, a disaster unfolded.

overview over the tank action

PLAoSS tanks lurking on the right side with the US armour covered in smoke in the distance.
Tank attack forming!

As soon as the proud armour column ventured onto the open plain, a hailstorm of fire tore into its ranks. CUSTARD's newest acquisition, a 100mm AT gun of Soviet provenance opened fire, killed the T-55 and damaged both T-34s. Apparently the gunners then opened a few bottles of stern stuff, otherwise it would be difficult to explain how they managed to waste their initiative against the M-3 command tank.

Weapons effects!
CUSTARD 100mm AT gun - waiting for its prey...
Tank attack bogged down - US CO looking for target...

With the tank advance momentarily stalled, the PLAoSS commanders decided to throw a renegade DRS tank platoon into the fray that had defected to the PLAoSS. Three M-48s slowly moved forward to overwhelm the single Sherman on the road with their firepower.

Well, that was the idea behind it anyway. In reality all the PLAoSS got for three 105mm guns at point blank range was an immobilized Sherman in return for a stunned M-48 and a lost initiative. It was all going really, really well.

My oh my - all you get for your armoured might is a suppression...
Let's blow it to pieces!!

CUSTARD then decided to probe cautiously forward and to reinforce the Sherman with one Centurion. More shots were traded, and in the end the Sherman was finally knocked out at the price of a damaged M-48.


Phase III: Infantry assault

Now the main offensive began. Infantry was thrown relentlessly against CUSTARD positions along the main road with the aim of simply saturating the defences. The first objective was house 5; having captured and secured house 5 it was then planned to fan out towards houses 4 and 3.

Trying to coordinate the infantry attack with another attempt at neutralizing the US vehicles ended in disaster, with the tank group out in the open being almost totally wiped out. Even the heroic attempt at ramming the Sherman resulted only in some temporary damage.

PLAoSS squads storming through the smoke, past a CUSTARD Centurion and over the Sherman pillbox - without doing ANY damage to it! Note the Sherman, knocked out at that time.
final end of the tank attack - note the T-34 trying to ram the Abrams.

Nevertheless the infantry offensive went on. Despite heavy losses among squad leaders, which resulted in many rifle groups being lost on the way either pinned or suppressed, PLAoSS finally managed to close in on house 5. Attempts at knocking out the Centurion beside the bunker failed, while return fire miraculously passed over the heads of the PLAoSSniks. In order to create a diversion a platoon-sized attack on house 3 was then started by PLAoSS.

Finally getting to house 5 - pin and suppression markers abound...
Isn't that a nice diversion? All those folks bent on business...

Although the troops arriving outside house 3 managed to silence the 100mm gun temporarily, they were very exposed, and a determined counterattack by CUSTARD engineers using hand grenades literally cut out the heart of the attack.

Remember the picture above with all those troops massed outside house 3? This is how it all looked like after the CUSTARD engineers started to throw grenades...
AT gun suppressed.
The same drama from above - note how the front two firing groups are essentially cut off from the rest of the troops.

Without effective tank support - the M-48s suffered from being pinned down and taken out by accurate US AT fire - the infantry assault made little headway. Every inch of the ground had to be bought by throwing at least a squad away, which slowly started to erode even the sumptuous ressources of the PLAoSS commanders.

"I want that Centurion destroyed!!!!" - but of course the PLAoSSniks managed to budge firing a RPG at point blank range into the rear of a tank...
General Mahmut coordinating the assault.

Particularly the Centurion and the Bunker now effectively surrounded by PLAoSS troops caused headaches, as sooner or later they could go into action again. Various efforts by AT teams failed miserably (I stopped counting when we arrived at two-digit figures...). Finally, the PLAoSS commanders decided to risk the only tank that was left capable of doing anything in trying to kill the Centurion.

Is it really necessary to dwell on the result?

PLAoSS tanks burning in the distance
The last surviving M-48 at least managed to immobilize the Centurion - not that it was bent on moving anyway...


Phase IV: Final push!

A final maior push was to bring the decision. Suddenly, the CUSTARD commander who up to that point had used his armoured ressources rather sparingly, staged an initially highly successful counterattack. Centurions and armoured cars tore into the ranks of the PLAoSS, making effective advance next to impossible.

Fearless CUSTARD leaderess spoiled by choice of targets...
Counterattacking Centurions - desperate attempts at blanking them off with smoke...

Moving the tanks to the front had the interesting effects that the priorities of the PLAoSS commanders shifted dramatically - instead of concentrating on house 3 (that would have been the smart thing to do) taking out the tanks moved up towards the top of the agenda.

CUSTARD vehicles overlooking the street - too much firepower to break by human wave assault...
One Centurion knocked out, but look at the vehicles in the background...

Using smoke rounds a daring AT team finally succeeded in stalking one of the Centurions. However, the other tank remained undamaged, and moreover the remaining CUSTARD vehicles now formed a defensive position higher up the road. Anybody moving forward would have run directly into a hailstorm of deadly fire.

Enemies all around, but CUSTARD engineers still inside...

The tactical situation was made all the more so difficult by house 3 being still not under PLAoSS control, but in the hands of CUSTARD engineers.

Effectively the PLAoSS offensive was now stalled for good. That, or so the two commanders thought, was the time for using the uber weapon in their inventory, a SU-25 Frogfoot CAS aircraft. The idea was for the aircraft to kill the Centurion first and then drop some nasty stuff on house 3.

That'll do - won't it?

Well, as war-winning weapons sometimes do, it did not work entirely as planned. In fact, it did not work at all - as they say, one SAM can really ruin your day. In this case it did not cause the total loss of the aircraft, but a damage resulting the aircraft in trying to kill the Centurion and then retreating to base not to come back. Needless to say, abysmal targetting resulted in the Centurion being totally unscathed.

With the PLAoSS offensive out of steam we finally called it a day. Further operations would probably have resulted in the remaining PLAoSS forces being mopped up by a CUSTARD/US counteroffensive.


So, what can be said about the game?

As seems to be the rule in our games, nothing worked out as planned. CUSTARD and US commanders almost freaked out about being grossly undermanned and underequipped in the face of an supposedly unstoppable PLAoSS onslaught. PLAoSS commanders on the other hand were very confident due to their sheer numbers and their war-winning shotgun, the Frogfoot. One important lesson we learned the hard way was that advancing green troops with dead squad leaders is really tricky.


BACK