 Tote Box Project
RATE THIS MATERIAL
Tote Box Project
RATE THIS MATERIAL
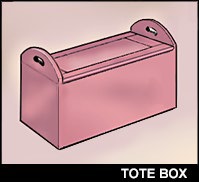
This tote is an adaptation of a project that appears in Kirby and Kelsey's book "Making Joints" (1996, Rodale Press). I discovered it while looking for a toy box idea for a new nephew. It is small enough that a child can move it about yet large enough to store quite a bit of treasure. Kirby's box is a demonstration of joining and uses finger joints -- an extremely strong box joint -- to connect the four sides. Because I needed to finish the box quickly for Christmas, I substituted biscuits but I've kept the overall dimensions of the original project.
All the lumber you need will come from a single 10' plank of 1x12
clear lumber, a couple of sticks from the scrap box (for the battens)
and a bit of 1/4" plywood for the bottom. Cut the back, front, sides
and bottom. Be sure the grain runs the same direction around the
sides of the box, otherwise, wood movement will tear the box apart.
Machine grooves for the bottom. Take care to stop the grooves in the
front and back pieces. Assemble and clamp the four sides and bottom.
Check for squareness, measuring across the diagonals. Mortice the
hinges fully into the edge of the back. They will be attached flush
on the lower surface of the lid. The handles should 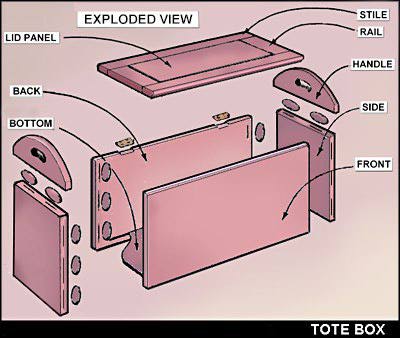 be attached later but you should first ease their edges since you will not be able to get at them after assembly. Ease the edges across the arc and in the hand-holds with a router and 3/8" round-over bit. Withdraw the bit partly into the router base to cut a thumbnail profile instead of a complete round. By the way, save the off-cuts from the handles; you will use them to clamp the handles while gluing.
The frame and panel construction of the lid gives the box its
character. The panel has a 1/4" tongue that fits into a 3/8" deep
groove in the frame. Leave a gap of 1/16" between the panel's field
and the frame. Chamfering the edges of the field at a steep angle
adds a nice finishing touch. Kirby joined the frame with deep mortices
and tenons but in the interest of speed, I used stub tenons instead
and reinforced what would otherwise be a weak joint (expect that the
lid will be used as a seat) with battens across the bottom. You may
want to refer to the book to make the lid with tenons as Kirby did.
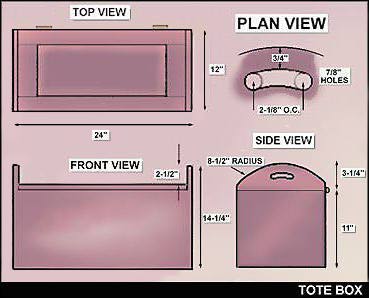
The lip of the lid is routed for a finger grip. Use a 3/8" core box
or cove bit to form the grip along the entire length of the bottom
edge of the front. Ease the edges with a light pass of a block plane
then sand them smooth. Check the swing of your hinges. If the lid
cannot drop down against the back, you run the risk of breaking the
hinges out of the box. Consider using a chain or lid support to
protect the hinges.
MATERIALS LIST
| QTY |
PART |
DIMENSIONS
|
| 2 |
sides |
3/4"x11"x12"
| 2 |
front & back |
3/4"x11"x24"
|
| 2 |
handles |
3/4"x3-3/4"x12"
|
| 1 |
bottom |
1/4"x11"x23"
|
| 1 |
panel |
3/4"x8"x18-1/2"
|
| 2 |
stiles |
3/4"x2-1/4"x22-3/8"
|
| 2 |
rails |
3/4"x2-1/4"x7-1/4"
|
| 2 |
lid battens |
3/4"x3/4"x10"
|
|
|
 | |
ADDITIONAL HARDWARE
|
(1) pair 1-1/2" brass butt hinges & screws
|
(6) 1-1/4" FH wood screws
|
|
(16) #20 biscuits
|
|
| Reference: "Making Joints" by Ian J. Kirby with John Kelsey, 1996, Rodale Press, Inc. |