


|
It is VERY IMPORTANT that the following steps are followed exactly. The measurements and placement of the pieces is VERY important!! If you choose to try this method on your dog or puppy I am not in any way responsible for the possible outcome of your dogs ears.

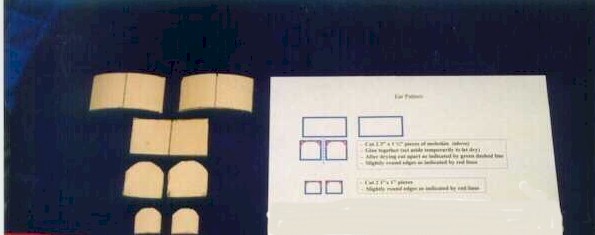
Prepare Moleskin per the instructions below when done they should look like this


  |
  |
 -
Peel back off of 1 ˝" x 1 ˝" piece, apply glue to entire back let set for a
couple of minutes and place inside bottom of ear all the way down to the
"button" at the base of the ear. Make sure piece is straight across top. Repeat
in other ear making sure the straight part of both pieces is at same height, this
is very important for proper break placement.
-
Peel back off of 1 ˝" x 1 ˝" piece, apply glue to entire back let set for a
couple of minutes and place inside bottom of ear all the way down to the
"button" at the base of the ear. Make sure piece is straight across top. Repeat
in other ear making sure the straight part of both pieces is at same height, this
is very important for proper break placement.
 -
Peel back off of 1" x 1" piece, apply glue to entire back let set for a couple
of minutes and place in top of each ear.
-
Peel back off of 1" x 1" piece, apply glue to entire back let set for a couple
of minutes and place in top of each ear.
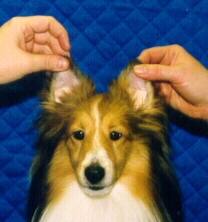
****Please ignore red yarn pieces.. Part of the long method***
When you are done both ears will look like this
 ****Please
ignore red yarn pieces.. Part of the long method***
****Please
ignore red yarn pieces.. Part of the long method***
 -
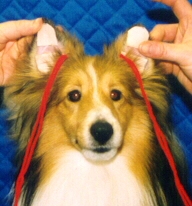
Cover top piece in ear with glue and press down to bottom piece leaving a small space for
breathing room. Make sure you are glueing the ear straight down and not following the
inner line as you have pulled them together.
-
Cover top piece in ear with glue and press down to bottom piece leaving a small space for
breathing room. Make sure you are glueing the ear straight down and not following the
inner line as you have pulled them together.
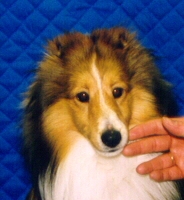
- These braces should stay in for a good 2 - 3 weeks depending on the weather and how fast your puppy is growing. Remove them completely as soon as any piece becomes loose!! Feel free to email me if you have questions!!!
When you are done they should look like this
Bronwyn Ruffian Wyndmyst for
 We would like to thank "Olivia"