1. You are going to make the exact same incision as you did the last time cutting up to the bottom of the rib cage. Now you are going to be cutting through the peritoneal muscle wall and opening up the body cavity. Since the muscle wall is slightly transparent, you can easily avoid the delicate anatomy underneath.
2. Reflect the muscle back or simply cut it off so you can have easy access to the structures in the body cavity.
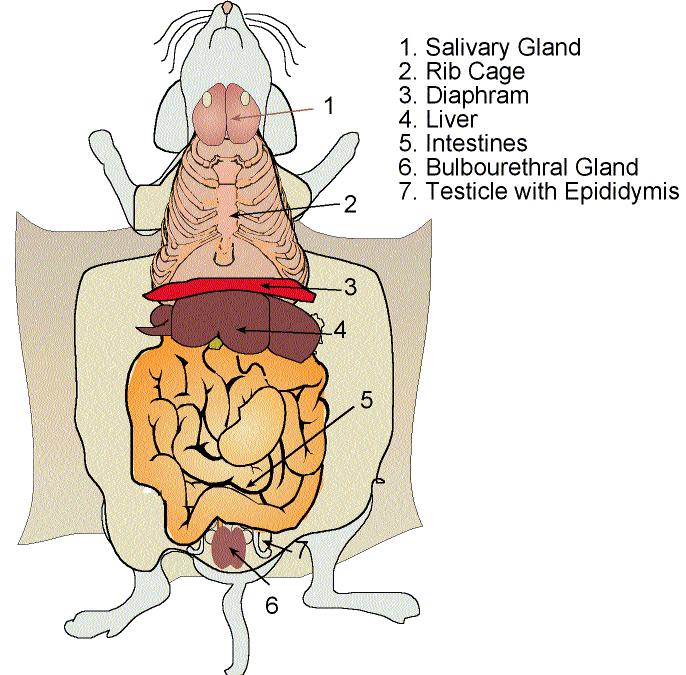
3. STOP RIGHT HERE!!!!!! Before any cuts are made, there are a few things to think about. First, notice the anatomical relationships between different organs. Does everything appear to be in the right place? Is everything the right color and shape? Check the color of the liver now before it has a chance to bleed out. It should be a shade of rich reddish brown. It is also very important at this point to mention technique. Just pretend what you have in front of you is a completed jigsaw puzzle and your job is to take the puzzle apart with the utmost care. In the end, you should be able to put the puzzle together with every piece fitting together perfectly. In other words, no slicing and dicing. With that said, let's continue.
*Note: The diaphragm in the diagram (now that is a tongue twister) is not correct. In a real mouse, it is not visible at this point. In reality, the liver fits securely into the bottom of the thoracic cavity held in place by the diaphragm. But for the purposes of this illustration, the diaphragm is drawn to show its function and location.
