 How To Make Ground Foam
Making your own ground foam is easier than you might think. The cost is but a fraction of purchasing ready made ground foam. I will take you through what you need and then how to make the foam. In a later tutorial I will show you how to make trees like the ones in this example. This example was taken on the north end of Dante Yard.

Finished trees with homemade ground foam.
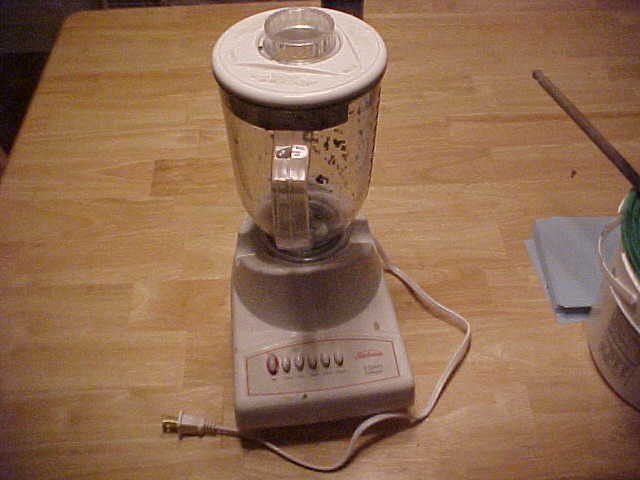
You will need an old blender as you see in example 2. After you put paint and other stuff in, the blenders food career will be at an end.
Next you will need some foam rubber. I found a mattress pad at a Dollar store for $8 (US dollars). I've used very little so far ( about 18 inches square) and made enough trees to cover about 5 dozen trees that are about 3 inches around. Just like in the first photo above.
|
An old blender |
Artist Paint |
Foam rubber |
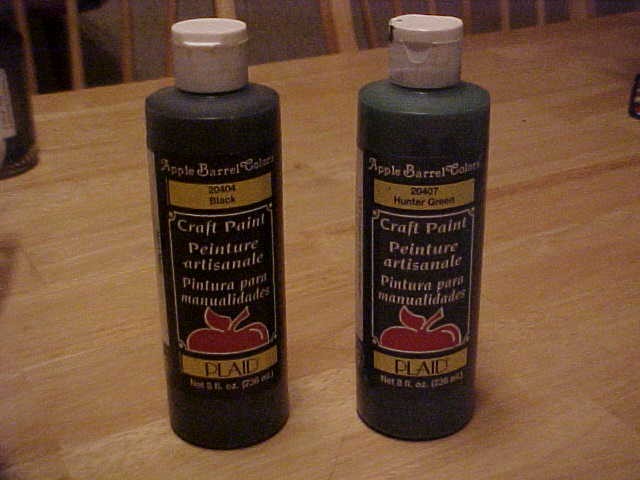

You will need artist paint. I found the bottles you see in the above photo at Walmart for about $1 each. You will need green and black.
Some extra odds and ends you will need are: Newspaper, an old wooden spoon or something to stir the foam with(in the blender), a small bucket, and water.
Ready to Roll? Here we go!
#1-- Cut a small piece of foam (about 4-5 inches square, and place it in the blender. (I cut up the piece into chunks to speed the process.)
#2-- Add about 1/4 cup water into the blender. This reduces the static that will build up ... so don't forget the water!
#3-- Add Paint. This part will vary as to how much black and how much green, but you will need about a 1 inch line( some paint may come in a tube). This is not that much paint.You vary the amount of black to get darker foam. If the batches of foam you make are different shades, Then great! Just like in nature. Some trees are darker than others.
#4-- Now you are ready to turn on the blender. You will want to make sure the color is mixed in well with the foam rubber. I use an old wooden spoon to help things mix in the blender. BE CAREFUL not to stick anything to far into the blender or you will 'blend" it in too. Not to mention possibly damaging the blender. The longer you mix (and the blender speed setting) will determine the size of the ground foam. Try to make it fairly fine.
#5-- Drain the water from the foam, and then dump the foam onto the newspaper. Spread the foam out so it may dry properly. This will take about a day (24hrs). If you do not dry the foam it may mold and not smell very good.
#6-- Now that the foam has dried, Its ready for use. Simply use as you would any 'store bought' foam. Make trees ground cover, whatever. The cost is low and you can make a lot of it easily. Store it in your favorite way( I use a bucket.).
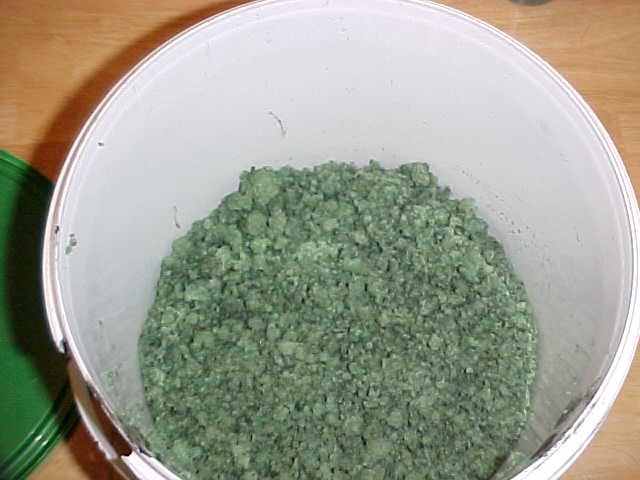
Finished foam in a bucket
I think you will find this project easy to do. And best of all it's an inexpensive way to have all that foam you need to make thousands of trees. I'm only guessing, but I think I might get about 4-5 gallons of foam from the piece of mattress foam I bought. Not counting the blender, that's about $10 in supplies. You just cant beat the price!
If you have any problems or comments, feel free to e-mail me at kpsub@hotmail.com Or even just to let me know if you liked this tutorial and would like more.
If you find this info helpful, Please make a donation using the site below. It is secure.
