
-
Selector 
-
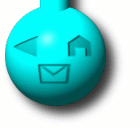
The selector (the balls and the tubes appearing on the left of the pages) were made using gimp. The tube was made by creating a 256x256 image, filled with the blue color. This image was mapped into a sphere (Filters -> Map -> Map Object) to get a nice coloured ball. The middle line of this ball (lets say 2 pixels high) were selected and pasted into another image with the same dimensions. Now we already have the basis of the tube. This images was rescaled to a 30x30 image, and there is your basic tube element.
 The next thing was to add an arrow to it to represent a selected
item. The arrow was created on a 100x100 transparent image. The
bezier selection tool was used to create the outline of the arrow
(and a bit curved by changing the tension of the bezier points).
This image was also filled with the blue colour and resized to a
30x30 image. This image was bump mapped (Filters -> Map -> Bump
Map) with the inverted option enabled to produce a cut-out
effect. This image was then copied and pasted into the tube
image to produce the final result.
The bottom ball was relatively easy to make, using the same principles all over again. I started with a 256x256 image, filled with the blue color. Then I created three small transparent images using the bezier curve tool for the mail, back and home pictures. The trick is to start large, so it is easy to create it and then rescale it to the final size. These images were bump-mapped and placed in the center of the 256x256 base image. Now the image was mapped onto a sphere (Filters -> Map -> Map Object) and the light source has been directed such that the result was well-visible (I used <-2.5, -5.5, 8.0>).
To make a seamless connection from the ball to the tube, the bottom part was cut-out with a eliptical selection and fitted manually by trial and error onto the ball.The top part is created by mapping a blue background on a sphere with the same lighting settings, apart from the y-coordinate which was sign-changed. A copy of a tube-element was also cut-out with the eliptical selection tool, again to make a seamless welded attachment.
All elements were stacked together and cut out in pieces, like the top part, the bottom ball and the two tube-elements. These are now in use by this entire site.
-
Slideshow 
-
The slideshow graphics was made using gimp. It is a very simple picture to create. I started with a 450x100 image. Then I created a new layer (Layers -> Layers & Channels -> New Layer) and I selected it as well. The eliptical selection tool was used to create the basic element that was anchored onto the new layer. The bucket-fill operation was used to fill it with a blue color. After that, the elipse was bump-mapped (Filters -> Map -> Bump Map) to give it a 3D look.
The "Slide Show" text was created in the same color as the elipse and (inverted) bump-mapped to make it appear as if it was etched in. The two buttons which would control forward and backward motion were created using the bezier tool as explained in the previous section. Those images were also bump-mapped onto the image.
Finally, all was given a nice shadow (Script-Fu -> Shadow -> Drop Shadow) as if the tool was elevated from the screen. This is so easy to do, even a beginner can do it in a jiffy. Certainly with this step-by-step solution. Here is where you can see it in action!