
SeGuruCool
The Largest Independant Solid Edge Resource Outside UGS

SeGuruCool The Largest Independant Solid Edge Resource Outside UGS |
|
www.oocities.org/SeGuruCool  segurucool @ indiatimes.com segurucool @ indiatimes.com |
|
|
|
In this tutorial you learn two important modeling techniques : It is assumed that you are familiar with the basics of Solid Edge Part modeling. |  |
|
Regular Polygon - Begin Sketching Start with creating a sketch  in the x-y plane. in the x-y plane. Draw a circle with its centre at the midpoint of one of the reference planes. |  |
|
Construction Using the Construction  tool, toggle the circle to construction. tool, toggle the circle to construction. |  |
|
Irregular Polyogn Using the Line  tool, create an irregular polygon. tool, create an irregular polygon. Draw the lines on the construction circle, so that the endpoints are connected to the circle. | 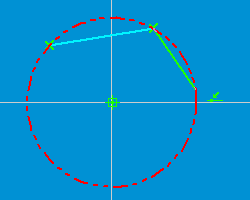 |
|
Avoid Relations Take care that new points are not horizontally or vertically aligned with existing points. See figure. |  |
|
Last Point Draw six lines to create a hexagon. Take care that the last point clicked is on the end-point of the first line and not on the circle. See figure. |  |
|
Make Regular Click the Equal  geometric relationship tool. geometric relationship tool. Make the first line equal to the second line in the irregular polygon. See figure. | 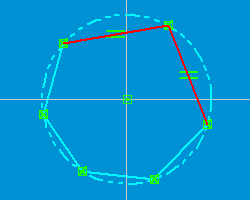 |
|
Make Regular - Carry On Similarly, make the second line equal to the third line. and so on... |  |
|
Make Regular - Finish Finally, all sides of the polygon are equal. This makes the polygon a regular one. |  |
|
Make Horizontal If the polygon looks a little tilted, make one of its sides horizontal. Click the Horizontal/Vertical  geometric relationship tool. geometric relationship tool. Select a line to make horizontal. |  |
|
Make Horizontal - Done Since all the lines are connected to the circle and fully constrained, the hexagon rotates. Your figure should now look as shown. |  |
|
Hexagon Dimension Apply a Smart Dimension  to the circle. to the circle. This dimension will control the size of the hexagon. Isn't that coooool ! | 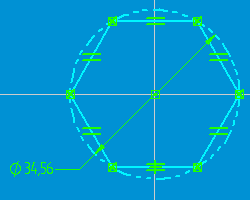 |
|
Hexagon Dimension - Tets It Change the dimension to a upper or lower value. The hexagon should : | 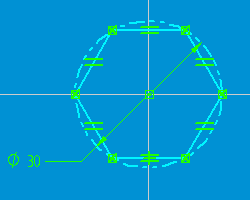 |
|
Make a Nut Start the Protrusion command and select the hexagon as shown in figure. | 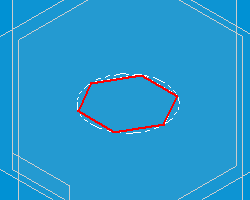 |
|
Make a Nut - Finish Complete the Protrusion. | 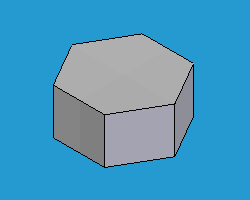 |
|
Revolved Cut - Begin Click the Revolved Cut  tool on the Features toolbar. tool on the Features toolbar. Select one of the vertical planes. |  |
|
Revolved Cut - Plane Select Choose the plane such that two faces of the nut are visible in the sketcher. This is important. See figure. |  |
|
Revolved Cut - Plane Check If you picked a plane and three faces of the nut are seen in the sketcher then, Click Finish in the sketcher immediately and return to the model. Click the other vertical reference plane. | 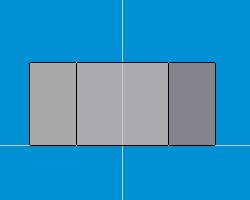 |
|
Axis of Revolution Click the Axis of Revolution  tool and select the middle vertical edge of the nut. tool and select the middle vertical edge of the nut. See figure. |  |
|
Draw Line Click the Line  tool and draw a line as shown in figure. tool and draw a line as shown in figure. The first endpoint of the line should be connected to the vertical reference plane. | 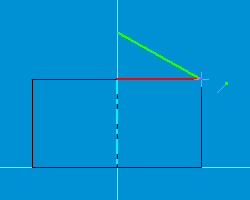 |
|
Angular Dimension The other endpoint of the line should be connected to the end of the nut as shown. Apply an angular dimesion of 30 deg to the line as shown in figure. |  |
|
Exit Sketcher Click Finish on the ribbon bar. Indicate the direction as shown in figure. |  |
|
All Round Cut Click the Revolve 360  option on the ribbon bar. option on the ribbon bar. You will get the chamfer as desired. The beauty of this approach is that the cut always remains as desired without adjusting any dimensions. |  |
|
Finish The only dimension to change is the diameter of the construction circle and the whole nut updates. This way you can also create regular polygons whose side can number between 3 and ..... |  |
Tushar Suradkar  segurucool @ indiatimes.com segurucool @ indiatimes.com |