SeGuruCool
The Largest Independant Solid Edge Resource Outside UGS

SeGuruCool The Largest Independant Solid Edge Resource Outside UGS |
|
Part - 1 www.oocities.org/SeGuruCool  segurucool @ indiatimes.com segurucool @ indiatimes.com |
|
|
|
In this tutorial you learn : It is assumed that you are familiar with the basics of Solid Edge Part modeling. |  |
|
Create Planes Start with creating two planes parallel to the y-z plane on either sides. |  |
|
Draw the Profiles - In Parallel Planes Sketch an arc in both the parallel planes. As shown in figure, the arc on the near side is bigger than the arc on the farther plane. |  |
|
Draw the Profiles - In x-y Plane Sketch two more arcs in the x-y plane. These arcs are connected to the arcs drawn in the parallel planes. |  |
|
Another Profile Sketch one more arc in the near side parallel plane . These arcs are connected to the arcs drawn in the parallel planes. |  |
|
Convert to Curve Use the Convert to Curve tool in the sketcher environment to convert the arc to a spline. |  |
|
Adjust the curve This arc has its end points connected to the ends of the larger arc. Pull few of the control points on the arc converted converted to curve and adjust its curvature as shown in figure. |  |
|
The Details Overall the curve looks as shown in figure. The end points are still connected and the Connect relationship handle is clearly seen. The arc seen below the curve is the one on the farther side parallel plane. |  |
|
The BlueSurf Click the BlueSurf  tool on the surfacing toolbar. tool on the surfacing toolbar. Select the bigger arc and click accept  on the ribbon bar. on the ribbon bar. Then select the smaller arc. Both - correct and incorrect - ways of picking the second arc are shown in figure. Pick in the correct way. |  |
|
Begin creating the BlueSurf Click accept  on the ribbon bar. on the ribbon bar. A Bluesurf is created as shown in figure. |  |
|
Add a Guide Curve Still in the BlueSurf command, Click the Add Guide Curves  button on the ribbon bar. button on the ribbon bar. Select the arc as shown in figure and click accept  |  |
|
Add Another Guide Curve Similarly, select the other arc as shown in figure. Click the accept  Preview and Finish buttons in that order. Preview and Finish buttons in that order. |  |
|
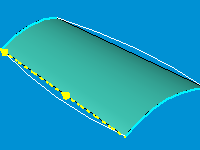
BlueSurf Created A BlueSurf, as shown in figure, is finally created . This surface spans the two arcs in parallel planes and is guided by the two arcs in the x-y plane. |  |
|
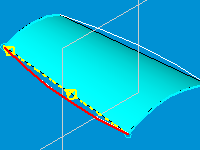
Once More Hide the Blue Surf created in last step. Create another BlueSurf. Use the same curves except that, instead of the larger arc, use the arc-converted-to-curve as the starting curve and the small arc and the guide curves remain the same. As shown in figure, the BlueSurf pointed by red arrow is the one created using the larger arc. The BlueSurf pointed by Blue (no pun intended) arrow is created using the arc-converted-to-curve. |  |
|
A clearer view Although the two BlueSurfs begin with different curves ( an arc and a converted curve), they both have a comon curve - the smaller arc on the far side. See figure. The red arrow points to the common arc on the far side. The yellow arrow points to the larger arc and the green arrow points to the arc-converted-to-curve. |  |
|
Click Here to go to part 2 of this tutorial |
Tushar Suradkar  segurucool @ indiatimes.com segurucool @ indiatimes.com |