SeGuruCool
The Largest Independant Solid Edge Resource Outside UGS

SeGuruCool The Largest Independant Solid Edge Resource Outside UGS |
|
www.oocities.org/SeGuruCool  segurucool @ indiatimes.com segurucool @ indiatimes.com
|
|
|
|
In this tutorial you learn : As it appears, the bottle is creatable simply by a revolved protrusion. The purpose here is getting familiar with surfacing features in Solid Edge. This will help when refering more advanced surfacing tutorials elsewhere at SeGuruCool |  |
|
Drawing the profile Start with the x-z plane and sketch a line. |  |
|
Extruded Surface Select the Extruded Surface  tool from the Surfacing toolbar. tool from the Surfacing toolbar. Click Select from Sketch  from the ribbon bar. from the ribbon bar. Pick the line and Click accept  Click Symmetric Extent  and type 100 for the extrusion length. and type 100 for the extrusion length. Click Finish on the ribbon bar. An extruded surface is created (see fig on right) |  |
|
Prepare to Trim Sketch a circle on the extruded surface as shown. |  |
|
The Surface Select the Trim Surface  tool from the Surfacing toolbar. tool from the Surfacing toolbar. Pick the Extruded Surface as the surface to trim. |  |
| Trimming Curve Select the circle as the trimming curve. Click accept  on the ribbon bar. on the ribbon bar.
|  |
| Which part to Remove Click to indicate which part of the surface to trim. See figure. |  |
| Surface is Trimmed Click Finish on the ribbon bar. The surface is trimmed as shown. |  |
|
Extrude Again Select the Extruded Surface  tool from the Surfacing toolbar. tool from the Surfacing toolbar. Click Select from Sketch  from the ribbon bar. from the ribbon bar. Pick the circle and click Accept 
|  |
|
Height Type 100 as height of extrusion and click above the plane. |  |
|
Offset Surface Select the Offset Surface  tool from the Surfacing toolbar. tool from the Surfacing toolbar. Pick the bottom Surface. |  |
|
Distance Type 100 as the distance to offset Indicate the side to offset See Figure. |  |
|
Surface is Offsetted An offset surface is created. Click Finish on the ribbon bar. |  |
|
Trim Again Trim the offsetted surface using a circle. See figure. |  |
|
Extrude Again Create another extruded surface as shown. See figure. |  |
|
Stitch the Surfaces Select the Stitch Surface  tool from the Surfacing toolbar. tool from the Surfacing toolbar. Pick all four surfaces - 2 cylindrical and 2 flat circular. Click accept  . .
|  |
|
Do not Heal In the Stitched Surface Options dialog that appears, make sure that the Heal stitched surfaces is unchecked. Click Finish on the ribbon bar. |  |
|
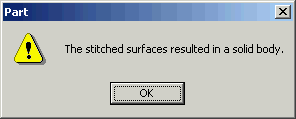
Solid Body Stitchng the four surfaces converts them into a solid body of zero thickness. |  |
|
Thicken the Solid Body Select the Thicken  tool from the Features toolbar. tool from the Features toolbar. Pick the solid body. Indicate the direction to thicken as shown in figure. Click accept 
|  |
|
Thickened Solid Body The solid body is thickened. See Figure. |  |
|
Round the Sharp edges Optionally, round the sharp edges. See figure. |  |
|
Summary The summary of all the above steps is as shown on the right. |  |
Tushar Suradkar  segurucool @ indiatimes.com segurucool @ indiatimes.com |