Build This Robotic Hand
Page 1
If you have read the article on "BUILDING A 52 INCH ROBOT WITH ARM" you will see that I said I was working on another robotic hand design. The new design went well as you can see by these specs. The hand can open to about 4-3/4" and fully open or close in about 1/2 sec. The hand can hold most objects without keeping power to the hand's motor. It can hold a full glass of water with ease and without any slipping. This is important because we will be building a wrist for the hand at a later time. This will allow a robot to do things like pour drinks and turn doorknobs.
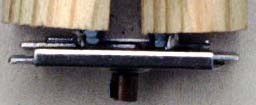
Ok, lets start building it. Before doing any cutting please look at the photos. Let's start by working on the rack and pinion assembly. We need to cut a slit down the middle of the shaft. The motor's shaft will fit into this slit. We can make the cut using a table saw with an abrasive wheel used for cutting metal.
Next we want to cut small niches in both sides of the rack and pinion assembly. This is where the small screws will attach the rack and pinion assembly to the wooden frame of the hand. Now drill a hole in the tabs giving enough room to put nuts on the tab when you put the 6-32 1-1/2" screws thru the hole. As you can see my drill bit slip and I was a little off.

We want to make some fingers for the hand. Cut 4-1/2" off of a wooden 2 by 4. Cut that in half so that you have two pieces of wood 1-1/2" by 1-10/16 by 4-1/2" long. Now put the rack and pinion assembly on top of the two wooden fingers. Postion the fingers so that when the rack and pinion assembly is close they just touch each other. Make sure that the rack and pinion assembly looks even on the fingers. When it looks ok, put a little hot glue on the side of the tabs to help keep the fingers in place. Now open the rack and pinion assembly and mark the holes on the wooden fingers. (I just put a nail thru the hole and give it a tap to mark where the hole is.)

Now where you marked the fingers you want to drill a hole 1-1/2 deep so that the 6-32 1-1/2" screws will fit.
Now put the screw thru the hole in the rack and pinion assembly tab. Attach two nuts to the screw.
Mark off on the side of the finger how far down the finger the screw goes. You want to drill a 5/16 hole that is 10/16" deep just above the mark. This is where you want to place a nut so that the finger can be attach to the rack and pinion assembly tabs. Place the nut in the hole and put the 6-32 1-1/2" screw thru the top hole in the finger and tighten. Put hot glue in the hole with the nut in it. Let the glue harden then remove the 6-32 1-1/2" screw. Now do the same thing to the 2nd finger.

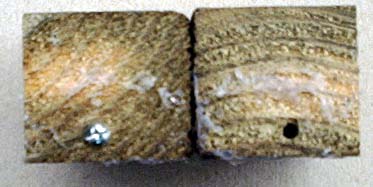
We now want to cut some of the finger away and give it a shape. Cut a 2-14/16" long slit that is 12/16" from the inside side of the finger. Then cut a slit to remove a piece of the finger. Sand as needed.

We need to drill a hole a little bigger than 3/8" (I used a tap to make the hole larger) 1-2/16" from the tip of the finger and 13/16" from the side on the finger. Glue the suction cup in place. Do the same to the other finger.

Attach the fingers to the rack and pinion assembly tabs. When you try to close the hand you will see that the heads of the 6-32 1-1/2" screws are too high and hit the pinion. You need to ground down the heads of the screws a little until they can pass over the pinion without hitting it.

Put hot glue around where the rack and pinion assembly tabs and fingers meet. This will keep the fingers from turning on the tabs. Add a little Petroleum Jelly to the rack and pinion.

Next Page