Step 1:
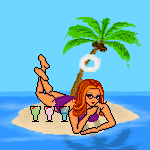
OK we need to select the Dollz and the wings we are going to use for our animation.
I have made a dollz and the wings to match.
Put them on a transparent backround.
I make all my dollz on Transparent backrounds.
My Blinking Tutorial shows you how to select the Transparent Backround.
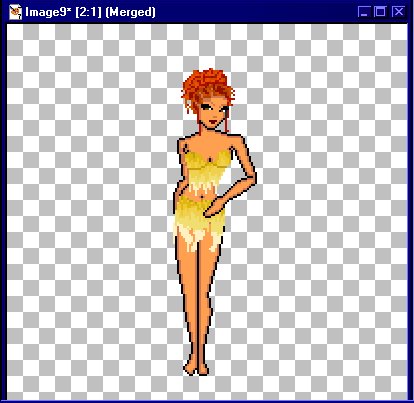
OK Now we have a dollz and wings to work with.
This Tutorial is a guide.
It's good to KNOW your Paint Program well.
This Tutorial contains Layers.
Layers can be our friends!
They seem difficult but once you get the hang of them it's extremely easy to do and becomes second nature.
I too Was confused by Layers at one time!
I grew out of it !

Step 2:
On another Transparent image 200x200 copy and paste the wings. Then Copy and paste the Dollz to the wings. Now copy the entire image and paste as a new image..you now have position 1 of the wing flap.
I would now save this image as a .psp file to make sure it is not lost.

Now the next series of steps are repeated for each wing position.
I use 4 wing positions in my Wing Animations.
You can also at this point get Animation shop opened and get the Animation ready.
Our animation will be 150x150.
This process is also explained in the Blinking Tutorial.
I set the Display time for all 4 Animation cells for 25.
Step 3:
OK on your original image where you combined the Dollz and the wings you will add a Raster Layer.
I never Change the name of the layer but if it helps you..go for it.
Now we have the image of the winged dollz and a layer on top of it.


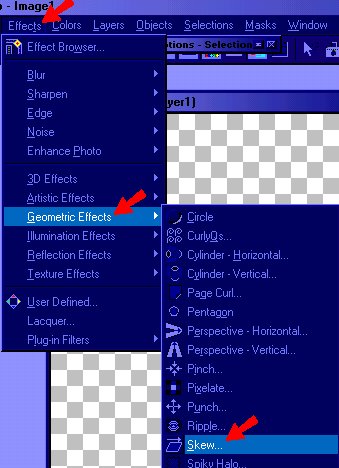
Step 4:
OK now we are going to start playing with the wings.
We are going to Skew the wing image.
Select one wing and paste on a 200x200 image.
Now we go to Effects/Geometric Effects/Skew.
Here's where the Fun begins..I have my numbers that I skew to. You can play with the image to see what you like.
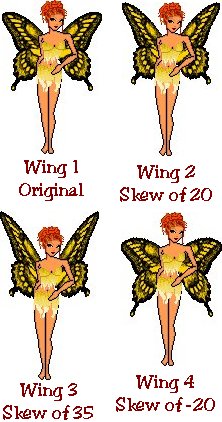
Step 5:
Now the first Position we will make is the lowest angle.. I select -20 for this but you can change the Numbers it's up to you.

Step 6:
OK now remember we have a Layer on the original Winged Dollz.
On that layer copy and paste your Skewed Wing.....Line it up where you feel it should go. Paste another wing and press ctrl+M this will mirror the image. Place the other wing opposite of the first wing.
Now copy the orginal Dollz (without the Wings)..
Paste it on the Wings and line it up with the same image underneath. Now Select all (ctrl+A) and Copy and then Paste as new image...Save as your second wing position.

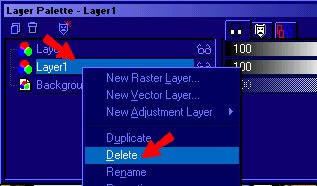
Step 7:
Now we will delete that layer and add a new one.
You Delete a Layer from the Layer Palette.
Also on the half of the wing we skewed..you can take the process back and undo to the original wing..or you can create another half wing image to skew.

*This is the Undo Button*
Step 8:
Here's where the repeating starts....
We have to make the rest of the wing positions.
You use the last 2 steps and here are the pictures and Numbers for the skews!
I'm gonna take a quick rest....
Whew..Glad I don't have wings.!

Wing 3

Wing 4
Ok here are all 4 images.
these are also the order I would place them in the animation.
Try to remember to save all your images on a transparent backround and in .psp form so we don't loose anything.
Now we are going to animate our faerie!
In the blinking Tutorial it shows how to make a new animation.
we are making another 150x150 animation.
Step 9:
Make your backround.
I made this one...Ok here we go with more layers.
Your backround will be the first Layer.
Add a raster layer on top of that. And place Faerie #1 where you want it on the backround.


Faerie Placed
Step 10:
Now Merge all the Layers.
So we can import the frame from Animation shop.
(All explained in blinking Tutorial)
Copy and Paste into Frame 1 and send back to Animation shop.
You'll repeat this for each frame.

Step 11:
Now Undo until you have your 2 layers back.
Add a third Layer to the image.
First layer: Backround
Second Layer: Faerie
Third Layer Empty for Now.
Now Copy your Second faerie with the skew of 20 wings.
Paste on third Layer and line up with the Faerie underneath.
Now Delete the Layer that contained the Orginal Faerie.
Now you have your Faerie with new wing position in same exact place as the first frame..Merge and place in Frame 2.
you will repeat this process until a images are used and frames are filled.
Step 12:
Now you should have all you animation done.
Save your animation.