 28.8.2003
bow
28.8.2003
bow
The bows are first built without the crash box. In the middle on the floor are the foam panels for the crash box glued. When the bows are glassed we can add them.
 28.8.
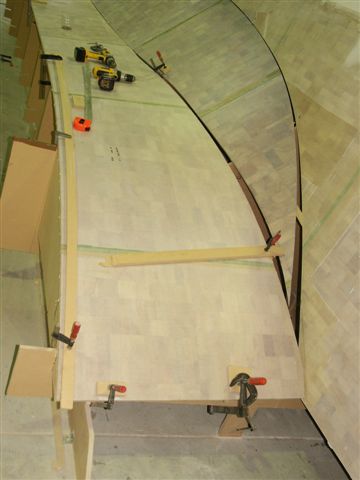
strip planking
28.8.
strip planking
The strip planking is sanded and ready to be glassed. There will be one layer of 750g weft triax added in this area, the same applies to the central join in the keel area. In the keel area the balsa core has now been exchanged with an epoxy fillet to allow for beaching.
 03.10.2003
stern
03.10.2003
stern
Here she received the stern
 03.10.2003
bow
03.10.2003
bow
and the crash box on the bow, all still without shape.
After some shaping and taping she's ready for the glassing job for the underwater area
- 300 g Kevlar to 15 cm over the waterline
- 400 g Double Bias to 20 cm over the waterline
So here we go:
 12.10.2003
Kevlar
12.10.2003
Kevlar
 12.10.2003
Double Bias
12.10.2003
Double Bias
and topped with some peel ply (that layer is ripped off again later, it just saves us from sanding it all before putting more epoxy on)
 12.10.2003
peel ply
12.10.2003
peel ply
and so on and so on
 12.10.2003
after dark
12.10.2003
after dark
meanwhile it's gone dark and we'll continue tomorrow - but the good news is the first hull is already finished as this photo is taken...
- and all the people thinking it's a lovely job to do, might remark our
toxic jogibear dress which is not for nothing....![]()
Next comes fairing and sanding the underwater area. As there are several layers necessary to make her look smooth, this takes a lot of time,
 08.11.2003
bow
08.11.2003
bow
but at least she looks like a boat now.
 08.11.2003
longboarding
08.11.2003
longboarding
To get it all nice and to produce an even surface, the tool to be used is NOT a power tool - it's the good old longboard (not the beach one).
This beautiful longboard was donated by fellow boatbuilder Alan, who somehow thought that we might evade this job... thanks again, Alan, we enjoyed the longboarding.
Next we'll add another three layers of pure epoxy to seal off the fairing and then she's ready for the underwater paint. The underwater paint will be put on only directly prior to slipping.
The scaffolding is moved away and we start on the chamfer panel area.
 22.11.preparing the chamfer panel
Hmmmmmmm?! See it?
 22.11. chamfer needs some adjustments
Some parts in the kit set need a bit of trouble shooting due to incorrect
surface generation by the computer programs ( hate computers ![]() ).
).
 22.11.
chamfer fits
22.11.
chamfer fits
After some adjustments and the last 'dry fit' the chamfer panel is glued and taped in place.
 22.11.
chamfer fixed and taped
22.11.
chamfer fixed and taped
The hulls are now ready for the fairing and sanding of the areas above the waterline.
 29.11.
fairing the chamfer area
29.11.
fairing the chamfer area
And after some beautiful days of longboarding (not on the beach) the hulls start to look smooth:
 01.12.
all faired and sanded
01.12.
all faired and sanded
After fairing and sanding the highbuild paint is rolled on. The remaining paint layers will be added using a spray gun when the boat construction is finished.
 14.12.
ready for turning :-)
14.12.
ready for turning :-)