|
Gold
Font Corner Frame Tutorial |
 |
|
Gold
Font Corner Frame Tutorial |
 |
|
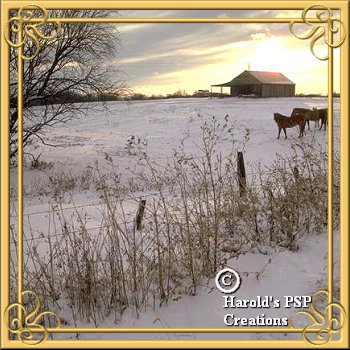
Here is a simple Gold Frame for you to make using a Font as Corners.
Follow the instructions and when you are finished you can add it to your PSP Frames collection. This tutorial involves the use of layers and the instructions are set out so that it is very easy to follow. Please choose a photo that you like, or perhaps a graphic of a scene that will look good under your Gold Frame. This tutorial was designed in PSP 6.02 and can be completed in other |
| Level of difficulty: Beginner |
|
|
1. Open new image, width="350" height="350", 16.7 million colors, Transparent.
2. Click on the "Color Options pallet." |
| 3. I have included this image on the right of the layers pallet for illustration purposes. |  |
|
4. Click on the "Layers Option Pallet." 5. Click on the "Flood Fill Tool" 6. Add a new layer and name it "Border." Click on the "Flood Fill Tool"
|
|
7. Go to "Selections/select all." The "Marching Ants" will surround the outside of the
Beige square.
8. Go to "Selections/modify/contract" and in the "Options box" that pops up, type the number 10 and press Ok. Wait for awhile and then you will see the "Marching Ants" will contract inside the square by 10 pixels. |
 |
|
9. Now to make the "Border." Press the "Delete Key" and the inside of the "Beige" square
will disappear leaving the center of the white "Color layer" showing through.
10. Deselect. Go to "Selections/select none" or try the shortcut by pressing the "Control+D" keys together and the "Marching Ants" will disappear. |
|
|
11. Click on the "Magic Wand Tool," 12. With the "Magic Wand," left click on the "Beige Border." The "Marching Ants" will appear to outline the "Border." |
 |
|
13. Go to "Image/effects/sculpture" and select the following settings. "Presets=Gold;
Size=100%; Smoothness=10; Depth=3; Ambience=0; Shininess=46; Color=white; Angle=315;
Intensity=30; Elevation=56." Click Ok. The "Border" will now be a rich "Golden Color."
14. Deselect. Go to "selections/select none." [or press the keys "cltrl+d" together] The "Marching Ants" will disappear. |
|
|
15. Now is the time to save your work. We need to do this often as we progress through
the Tutorial. It would be such a pity to do so much work and then "lose" it if something
should go wrong with your Computer."
16. Go to "File/save as" and name this image, "Gold_frame.psp." Make sure that you save in the .psp extension so that the "Background" remains transparent." |
|
17. Click on the "Layers Option Pallet." 18. Click on your "Preset Shapes Tool," |
 |
| 19. Draw a beige "Inner border" by starting at co-ordinates W=20 x H=20 and dragging down and to the right until you reach co-ordiantes W=310 x H=310. | |
| Now to save your work again. Go to "File/save" and your work will be updated in the same name of "Gold_frame.psp." |
|
20. Click on the "Magic Wand Tool," 21. With the "Magic Wand," left click on the "Beige Inner Border." The "Marching Ants" will appear to outline the "Border." |
 |
|
22. Go to "Image/effects/sculpture" and select the following settings. "Presets=Gold;
Size=100%; Smoothness=10; Depth=3; Ambience=0; Shininess=46; Color=white; Angle=315;
Intensity=30; Elevation=56." Click Ok. The "Inner Border" will now be a rich "Golden Color."
23. Deselect. Go to "selections/select none." [or press the keys "cltrl+d" together] The "Marching Ants" will disappear. |
|
|
24. Click on the "Layers Option Pallet." 25. Turn the "layer 1" and "color layers" off by clicking on the "small glasses" to the right of the "Layer headings." [See the Layers diagram at the beginning of this tutorial.] Red crosses will appear on the "small glasses." 26. Go to "Layers/merge/merge visible" and the "Border" and "Inner border" layers will merge. 27. Right click on the "merged layer" heading and when the "Options box" pops up, click on the word "Properties." Rename the merged layer by typing in "Border." 28. Turn the bottom 2 layers on again by clicking on the "small glasses" and the "red crosses" will disappear. |
|
| Now to save your work again. Go to "File/save" and your work will be updated in the same name of "Gold_frame.psp." | |
| To Page 2: | To Tutorial Index: |