 Windows Mobile Wireless Adhoc Networking Windows Mobile Wireless Adhoc Networking
Almost a year later, I'm updating this guide for Windows Mobile 5. As you've no doubt know by now, WLAN sync option has been removed since ActiveSync 4.0, which is also the minimum version required by WM5. Correspondingly, the Internet sharing part of the guide will be simplier. But I've expanded on the desktop file sharing section. Older versions of the guide are still available here: Windows Mobile 2003 version and Pocket PC 2002 version.
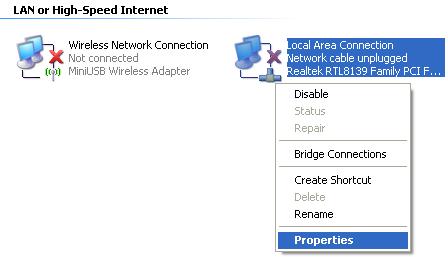
1. Desktop (or notebook) settingsThe bulk of the configuration will be here. The desktop is running Windows XP with Service Pack 2. Looking at the Taskbar notification area screenshot, there are two network icons visible - the left one is the wireless network and the right one is the LAN. The LAN is to be the Internet connection (It is disconnected in this instance, but just assumed that it is connected). Open Network Connections page by right clicking any one of the icon and selecting Open Network Connections.

Go to the properties page of the wireless network by right-clicking on Wireless Network Connection and selecting Properties.

Go to the Wireless Network tab, then add a new network by clicking on the Add button.

Fill in the SSID and check the last box to indicate this is an ad-hoc network. Data encryption is disabled in the example below. However, I strongly recommend turning on WEP after the initial set-up. Network Authentication can be left at Open.

The next step is setting up Internet Connection Sharing (ICS). Back in Network Connections page, open the properties for the Internet connection. Right-click on the appropriate connection and select Properties.
Note:
The Internet connection is normally made through a dial-up modem, or a network card which is connected to cable/ADSL modem. The example in the screenshot above uses a network card (which is disconnected at the moment).
In the properties page, go to the Advanced tab and enable ICS.

To configure the firewall, click the Settings... button under Windows Firewall. In the Windows Firewall dialog box, go to the Advanced tab. Disable the firewall for the wireless connection but leave it enabled for the Internet connection.

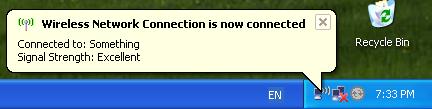
At this point, the configuration for desktop is complete. The wireless network should indicate that it is connected as shown in the screenshot below. If it doesn't, especially when there are other access points around, one might need to manually select the newly created network and/or even restart the system.
There isn't really anything to set on the device. Enable the wireless adapter on the device and a New Network Detected notification box will pop-up. Simply select The Internet and tap Connect. After a short while, the device will pick up a valid IP address, then everything is ready.
Note:
It appears that when wireless is enabled, the device will first connects to the desktop with a private IP address in the range of 169.254.x.x. Within 30 seconds, a new IP address will be assigned in the range of 192.168.0.x. Only then is the connection correctly established.
With adhoc connection established, it is possible to access files on the desktop from the device. The reverse (access files on the device from desktop) is unfortunately not possible.
Right click on the folder that is to be shared and select Sharing and Security.

In the properties page, check the box to enable sharing and provide a share name. The 2nd checkbox provide write access to the folder.

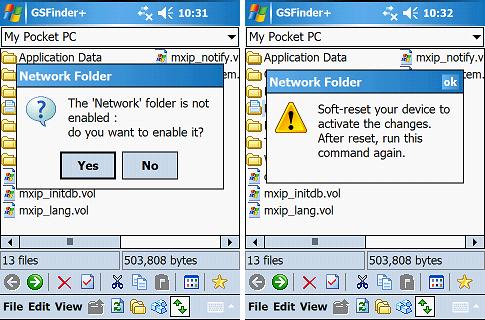
For the device, I use GSFinder+. Invoke File -> Tools -> Network Connect... to map the shared folder to the device. The first time this item is run, you'll be ask if you want to activate the Network folder. This is a special folder, which appears to be like a storage card, that will contain mapped folders. The device also needs to be reset before this special folder will appears. Since the program enables the folder by adding a registry entry, you should either suspend the device before hitting the reset button, or use a software to initiate the reset. My Soft Reset Utility should do nicely.
With the Network folder enabled, running Network Connect... item again will give a prompt as shown in the screenshot below. Remote field is the path to the desktop computer. This is specified in the format //<Computer's Name>/<Share Name>. Local name specifies the name of the folder that will appear under the Network special folder.

You can check the computer's name by going to System Properties on the desktop. Hit the key combination Windows + Break then navigate to the Computer Name tab.

Finally, you will be prompted for username, password and domain. Enter the current username logged in as shown in the Start Menu and the corresponding password (blank if there's no password). The Domain field can be left blank. Save the password when prompted and you won't be asked the username again.

That's it! The files on desktop should now be visible. Remember that you can un-map the folder using the item File -> Tools -> Network Disconnect...

Hope this guide has been useful. As usual, feedbacks are welcomed.
