I've been insterested in getting an Aerostar as a combination utulity and recreational vehicle ever since I compared it to the very popular Dodge Caravan (and the Plymoouth Voyager). The Aerostar is built on a stronger frame, though not a real frame like a truck, and is a rwd by design, with a 4wd option. I got a used 1990 4wd XLT model back in 1994 from someone who did not drive it much. It seemed like a great deal at the time. But it did come with a few problems.
First, its valve cover gasket was leaking pretty badly; enough to leave a smoke trail from the oil dripping on the hot exhaust system. The previous owner had purchased Ford's ESP Total with the car, so with a $50 trnasfer fee, I got it for the remainder of the contract. With a $50 deductible, the local dalership replaced the gaskets, and the oil leaks stopped for a while.
Second, the air conditioning system didn't work. As may be typical of these new systems with the slip-fit plumbing connectors, they developed leaks with engine vibration. This van has the auxillary HVAC system, so it has almost 3 times as many of these fittings as a van with just a single HVAC system. Another $50 deductible, and the dealership repaced all the O-ring seals in the system and recharged it. That lasted for a couple of months, and I took it back to them. They did the same thing again, and again, it lasted for a couple of months. I then tried to fix it myself by replacing the seals at the joints that leaked, and then reinforcing them with pipe clamps designed for these joints. THat lasted a little longer, but the coolant eventually leaked out again.
Third, there was always the smell of raw gasoline coming from the van, especially right after a fill up. I dropped the fuel tank to find that the mounting plate for the fuel pump and level sensor had an improperly installed gasket. It's hard to believe the original owner lived with this for 4 years.
More recently, the van developed a number of problems associated with old age and wear and tear. But they seemed to be rather severe for the age and amount of use this car gets compared to my Mustang.
There were nearly constant oil leaks from the bottom of the engine.
One that I tried to fix a number of times was the low oil level sensor that's screwed into the side of the oil pan. (Talk about justifying its own existence.) The sensor body itself leaks internally and from its threads. The thread leak was sealed by wrapping some Teflon tape around it before screwing back into the oil pan. But the internal leak was much harder to fix. Oil eventually comes out of the electrical connector. I've tried filling that area with RTV, but it never holds. The only solution is to get a new sensor (or an old one that doesn't leak from a salvage yard).
A fairly recent leak appeared between thge engine and the transmission. This could be from the rear main seal or the oil pan gasket. On mine the oil pan gasket was definitely leaking, but it was not clear whether the rear seal was. I replaced them both, and it was quite a lot of work, and the bulk of the follwing describes this task.
To get to the rear of the engine, the transmission must be removed. Since this is a 4wd car, a transfer case is attached to the rear of the transmission, so that has to be removed first. Before getting to that, the rear drive shaft has to be removed.
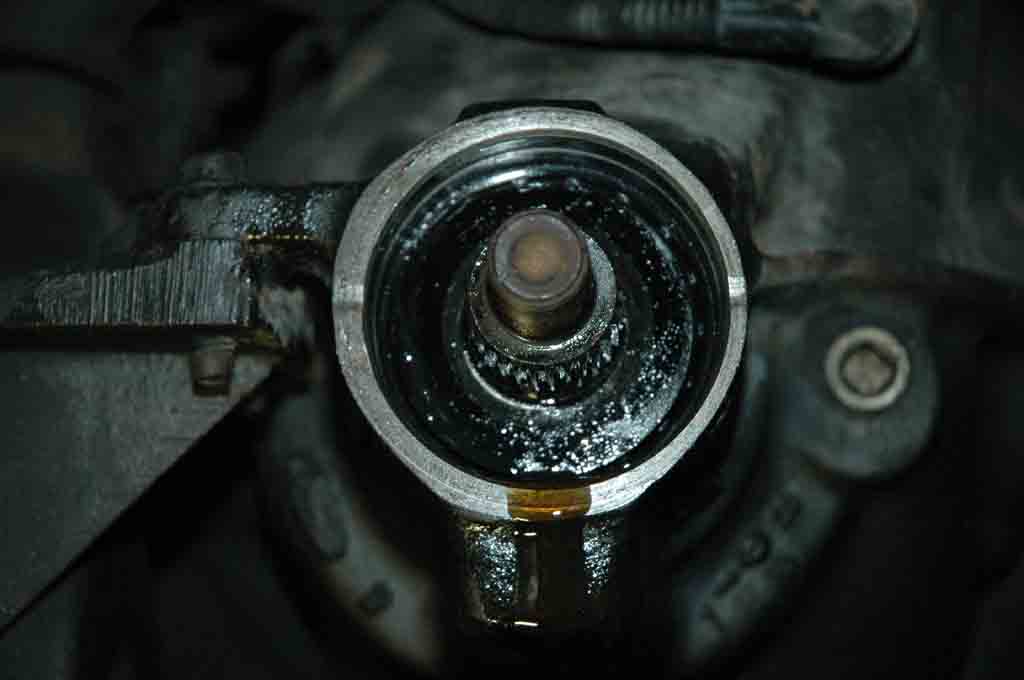
The companion flange of the driveshaft is attached to the rear differential pinion with 4 bolts that have some powerful thread locking compound on them. A few seconds with a blow torch on each bolt will make them much easier to remove. My van also had a leak in the rear differential pinion seal. I used a long crowbar to hold the pinion steady while I removed its nut. I tried to use an inch-pound torque wrench to measure the bearing preload on the pinion, but I just could not get any readings. So I marked the position of the nut relative to the pinion so I would torque it back to the same position as it was before. For some reason, my rear pinion bore is slightly off center.
I found it much easier to remove the transmission crossmember first before going further. This will let the tail end of the transfer case be lowered, so its fluid can be drained before removal. This also allowed easier access to the bolts holding it to the transmission tail housing. Next, disconnect the electrical connector for the exhaust gas oxygen sensor at the dog house opening, and remove the sensor from the exhaust Y-pipe. Now drop the exhaust Y-pipe. This will actually require raising the tail end of the transmission in order to get at all the bolts that hold the pipe to the exhaust manifolds.
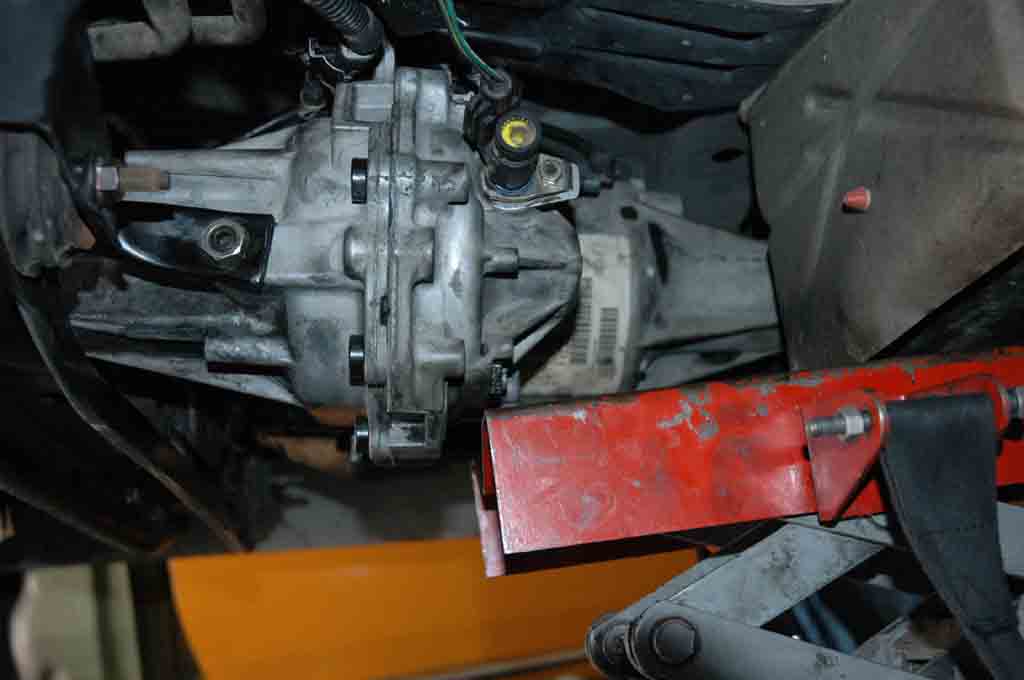
There are a couple of eletrical connectors on the transfer case that must be disconnected, and the support brace on the left side must be removed. Then disconnect the companion flang of the front drive shaft from the front differential. I left the shaft engaged to the transfer case, and pulled the whole assembly out. I used a transmission jack with some wood blocks to support the transfer case, and another jack under the transmission to hold it up while I pulled the transfer case off. Here it sits with the other parts removed so far.
The transmission itself has a number of lines and connectors that must be disassembled. Draining the fluid first will reduce the mess later. The main connector can be disassembled from inside the dog house cover. Keep this harness with the transmission. The shift and kick-down linkages should be removed and tucked out of the way. Then the fill tube and vacuum line for the modulator should be disconnected and tucked out of the way. These tubes have brackets that bolt down to a boss on the intake manifold. Remove the bolt, and the tubes should move freely. Finally, there are the two fluid cooling lines that have to be disconnected. They have a bracket that hold them against the side of the engine. Loosening the nut most of the way will allow these tubes to be move out of the way. Also, the oil filter adapter should be removed. I had to replace the 3 O-rings in the adapter, as they were old, hardened, cracked, and leaking.
Remove the starter motor to get access to the torque converter to flywheel bolts. There are 4 of them, 14 mm in size. Use a 19mm socket on the crank nut to turn the engine to bring each nut to the starter hole, and then to hold the crank nut steady while removing the nuts. With the transmission jack supporting the transmission, and another jack supporting the engine, start to remove the bolts around the bell housing. Don't forget that single 8mm bolt that holds the cover plate to the bell housing on the passenger side. The top two bolts have to be removed from the dog house opening. When all the bolts are out, the transmission should pull apart from the engine.
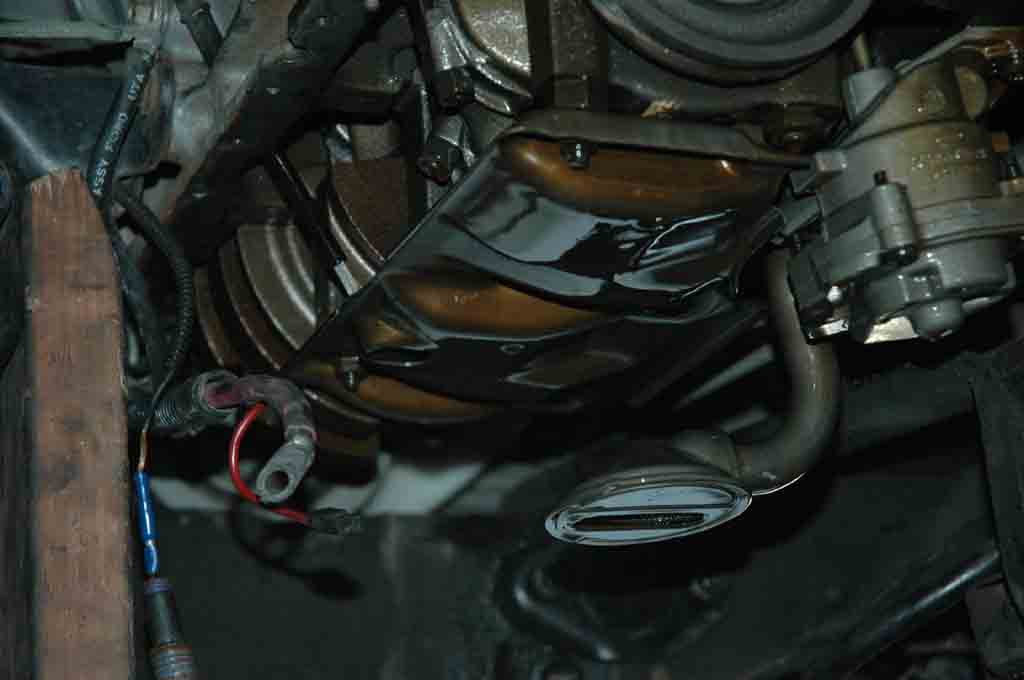
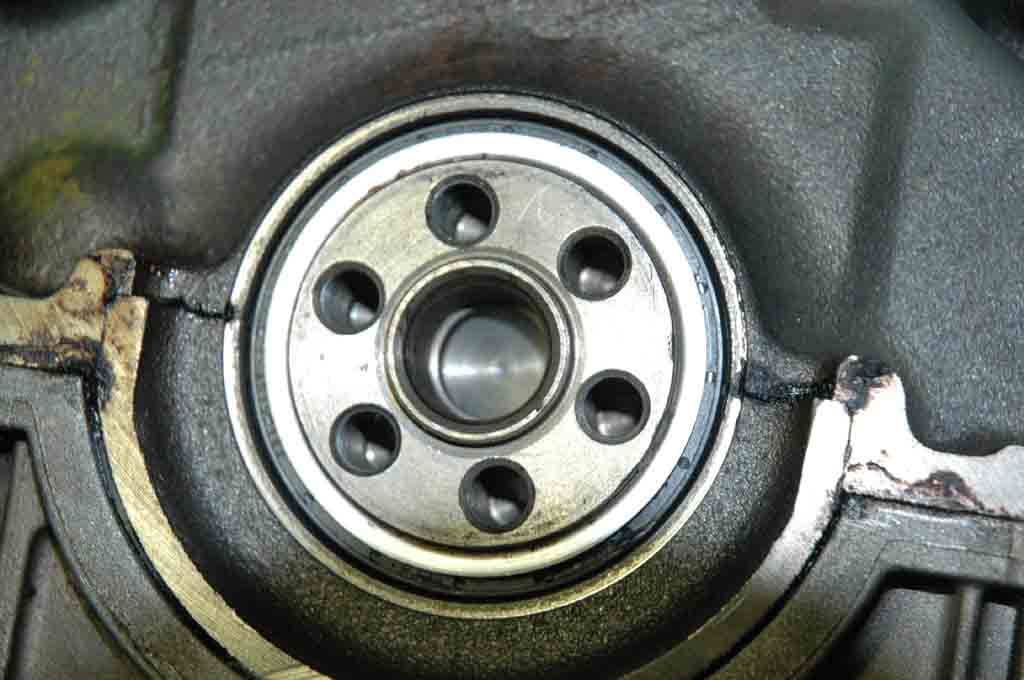
Now the rear of the engine is exposed, and the flywheel can be removed to access the rear seal. My oil pan gasket was also leaking so I had to get at it as well. This involved removing the oil pan, which required removing the front axle. Then the nuts holding the engine mounts had to be removed so the engine can be pushed up a little in order to provide enough clearance for the oil pan to be removed. The front 5 bolts of the oil pan had to be removed from the front using an open ended wrench. There are 4 studs screwed into the engine lock, and the front 2 should be removed, again for clearance. This reveals the bottom end of the engine.
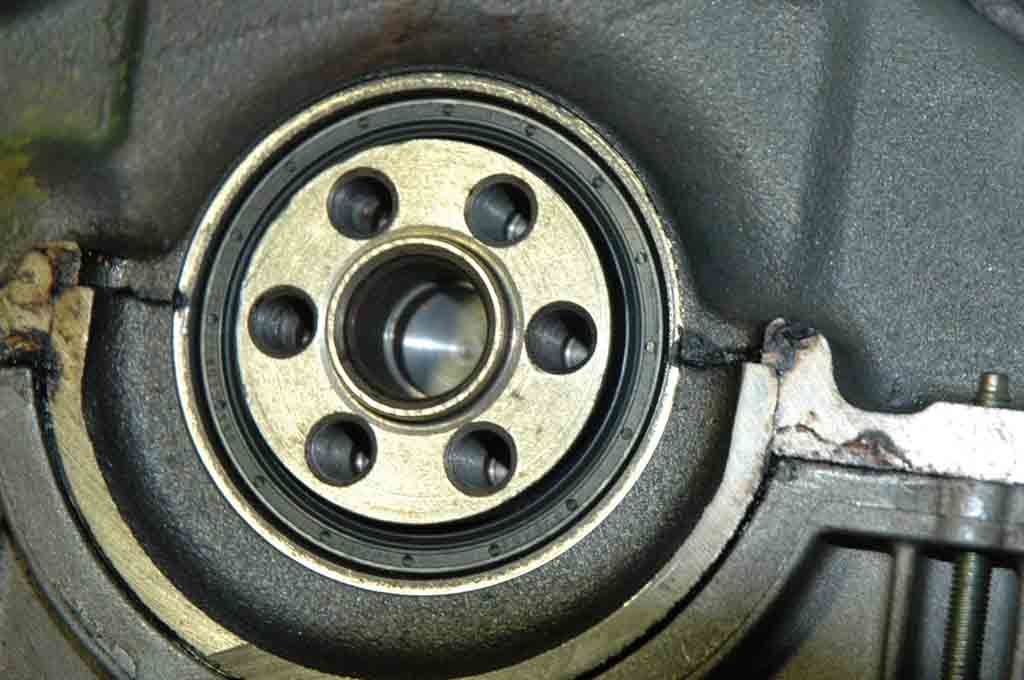
There are these tiny wedge seals that go into tiny gaps on either side of the rear main bearing, and they're very difficult to remove. I ended up removing the rear main bearing to get at one of them. When re-installing the rear main cap, it needs to be aligned to the block so that they form the rear seating surface for the rear main seal. And it is advisable to use new bolts, as the originals were torqued to yield.
When re-installing the oil pan (with its new gasket and plenty of sealants at the ends), it is important to align it with the transmission bell housing. The pan is a heavy cast aluminum structure, and is designed to bolt together with the transmission to help reduce vibration from the angine. If not properly aligned, it will start leaking almost immediately. I first installed all the bolts loosely by hand to hold the pan in place. The I brought the transmission up to the engine (without torque converter yet) and engaged it by the locating dowels. Then I installed and tightened all but the bottome two bolts. Then using a TorX socket and some long extensions, I tightened the two bolts on either side of the main bearing hump on the oil pan enough so that the two bottom bolts on the bell housing will thread into the holes in the oil pan. Then I torqued the two bottom bolts so that they drew the oil pan against the bell housing. Then I torqued all the oil pan bolts. Again, the 5 across the front had to be tightened with an open ended wrench, and the two front studs had to be installed with proper adjustments of the engine position. I left this for about a day to let the sealants cure before removing the transmission and onto the rear main seal.
The rear main seal can be installed with improvised tools. I used a short section of 2.5" ID schedule 40 PVC pipe. It is used as a mandrel to help press the seal into the gap between the rear of the crank and the block. This size PVC pipe fits perfectly in this gap, so it can be used to push the seal into the required depth. I used a bracket from a puller tool as a press to push the bearing in place. This easily installed the new seal into position. Then I used the same method to install the steel sleeve that went over the rear of the crank.
At this point, the flywheel can be re-installed, and the transmission can be re-installed for real. (Don't forget to install the bell housing cover.) First, re-fill the torque converter as much as possible (after draining out the old fluid). Install it onto the transmission input shafts by turning it until it completely seats. There will be 4 steps of seating, and when it fully seats, it will hit the bell housing in the back. Bring it up against the engine with the tranmission jack. Use another jack under the engine to set its angles so it lines up with the transmission. As I brought the transmission closer, I turned the torque converter to line its studs up with the holes on the flywheel. A little bit of jocking around should bring them easily together. Any heavy resistance should be checked out and corrected before proceeding. But the rest is just reverse of disassembly. Just remember to tighten up the nuts on the engine mounts and transmission crossmember after everything has been properly positioned.