
Introduction
Ok let me first start by saying that I realize everyone's PC is slightly different and that this tutorial may not work for all users.
Also don't try to view the pictures on this page unless you are running at a screen resolution of 1024 by 768 or higher, even then the pictures are rather large.
Though if you want to use the map editor properly you will have to learn to run with a screen resolution of at least this much, so get used to it.
Oh yes I may have forgotten some vital download that is needed for certain textures or something else along those lines, so please understand if this tutorial is not perfect, if I have missed anything out that you know about please e-mail me about it and ill upgrade the tutorial ASAP.
If you follow most of the basic instructions you should be making maps for elite force holomatch in no time.
Simply click on one of the links bellow to jump to that section:
Setting up the map editor program
Renaming files in the tools folder
General Layout of the map editor
De-selecting & Re-Selecting brushes
Placing lighting and a spawn point
Setting up the map editor program
Make sure you install the map editor program to your Star Trek voyager elite forces folder and not its default installation folder or any textures that you try to use just wont work at all, in fact you probably wont see any textures, period.
Once the map editor is installed run it by going to:
Start
Programs
Raven Software
Star Trek Voyager Elite Force GDK
Shortcut to efRadient.exe
Then click on "Edit" and "Preferences".
This will bring up the following box, simply click on the picture ( see Figure S1 ) bellow to bring up a full sized screen of what you edit preferences should be like.
(Figure S1)
(you will probably have to restart the map editor now to make sure any changes take effect)
Creating maps for multiplayer games on the net is very easy if you use the following steps.
Sadly many tutorials on the net neglect to mention this and it drives most first time map makers nuts trying to figure out why there maps only work for single player mode and not holomatch.
Basically all you have to do is rename two files in the "Tools" folder in you Star Trek folder.
Renaming files in the tools folder
Run the map editor program. Then once it is open minimize it and double click:
My Computer
C:
drive
Program Files
Raven
Starr Trek Voyager elite forces
Tools
What you have to do here is modify two of the files.
But first lets start by making a folder called "Backup" inside the tools folder. ( see Figure R1 )

(Figure R1)
Inside the backup folder place a copy of "SP_entities.def" and "HM_entities-def.txt" ,these will be necessary in the future and should not be modified. ( see Figure R2 )

(Figure R2)
Now we are going to modify the two files still in the main "Tools" folder from:
"SP_entities.def" and "HM_entities-def.txt"
to
"SP_entities-def.txt" and "HM_entites.def"

(Figure R3)
Once you have renamed the two files and they appear, as in the picture above ( see Figure R3 ), maximize the map editor again and then close it.
Now open the map editor again and this will allow you to make sure that the map you make is for multiplayer matches, it will basically flush all the textures and entities that can only be used for single player games and give you only the ones that are used for holomatch games.
If you want to make certain that you have done it all correctly simply right click on the map editors main screen when it comes up again and select Weapons, you will see the following weapons listed (see Figure R4), if you have more then you haven't followed the steps correctly and the map editor wont have been set up correctly.

(Figure R4)
Now you may ask "why did I bother to make a backup" of the two files which were renamed earlier.
You made them because once your pc has been switched off and then turned back on again it will forget the changes you made in the tools folder and the map editor program simply wont run properly.
It will come up with some stupid error if you try to run it again and wont work what so ever.
What you have to do is go back to the "Tools" folder and switch the two modified files with the backup files so that your tools folder looks like the picture below. ( see Figure B1 )
(Figure B1)
This will allow you to run the map editor program again.
Each time you turn your pc off then on again you will have to go through this entire procedure from the start to finish again to make further maps for holomatch mode.
(This may sound like a real pain in the ass, but believe me, once you are used to doing this its actually very simple and can be done in under 5 minutes)
Ok I'm not going into how to make maps for single player mode as I cant really remember how to do it properly and holomatch mode is what most people use and want.
Ill keep it simple to start with, we are only going to make a basic room with a spawn point and light so that you can run around your own domain shooting the four walls to bits. ^_^
This should work if you have made the modifications already stated above ( see Multiplayer mode ) so that you can make maps for holomatch.
General Layout of the map editor
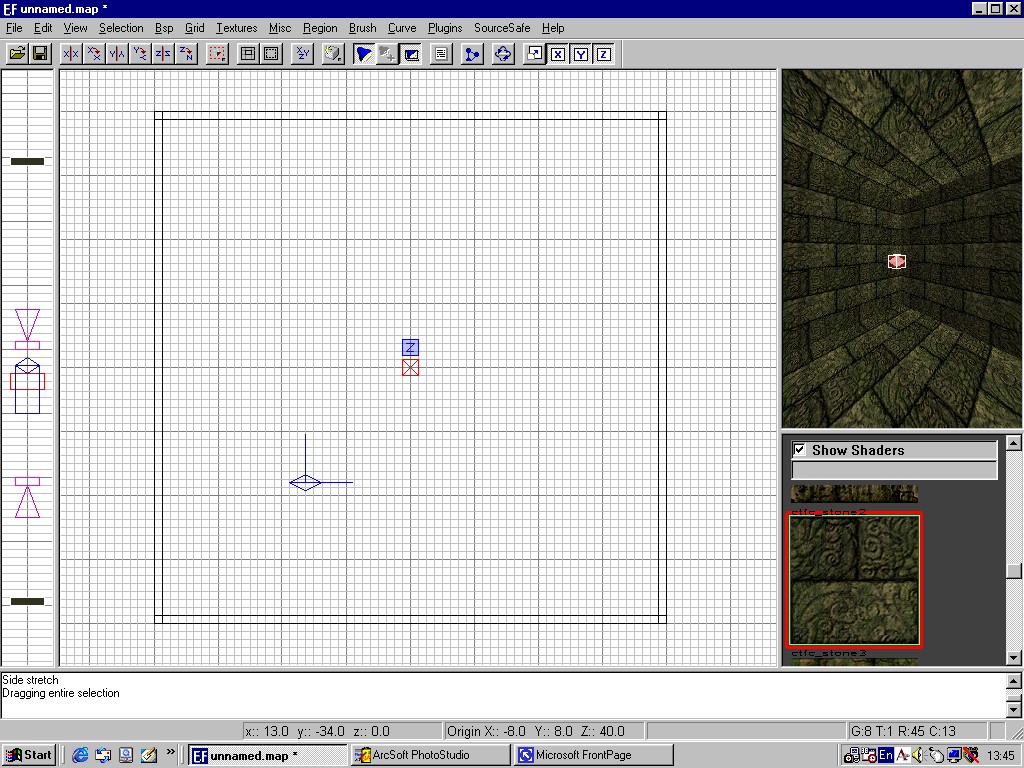
Open the map editor after configuring it for multiplayer mode and you should get the following default layout. (see Figure GL1 )

(Figure GL1)
A large window in the center - Used as the main work area where the map is constructed
A top right window - Giving a 3 Dimensional view of your map
A middle right window - That stores all the currently selected shaders that you are using
A window along the bottom - Used to list which shaders are loaded
A long thin window to the left of the main window - Used to represent the height of brushes which are used
A brush is what is created when you hold the left mouse button down in the main "center window" and drag out a square/rectangular shape.
It could also be referred to as a shape, box object etc, but for the sake of this tutorial I'm calling them brushes.
The camera is what is used in the 3D window to look at everything you make, it is an invaluable tool and should be used at every opportunity in map making. ( see Figure T1 )
(Figure C1)
Look at the above picture, your camera is the funny little diamond shape with the two little antenna coming out of it, that appears just bellow the Z in a box.
You can move the camera around using the following keyboard keys:
| Up arrow key | = | Move forward in 3D view |
| Down arrow key | = | Move backward in 3D view |
| Left arrow key | = | Turn left in 3D view |
| Right arrow key | = | Turn right in 3D view |
| D | = | Move up in 3D view |
| C | = | Move down in 3D view |
| A | = | tilt view up in 3D view |
| Z | = | tilt view down in 3D view |
It wont seem to do much at the mo as we haven't put anything in yet for it to see.
You can zoom in and out of the main window ( Center ) using the "Insert" and "Delete" keys on the keyboard.
This is useful when moving things around and if you want to get from one part of your map to another quickly, or if you want to look at a particular section in more detail.
Hold the left mouse button down now in the main "center window" and Release once you have a square brush shape. ( see Figure B1)

(Figure B1)
To make the brush taller all you have to do is move the mouse over the left most window click and hold the left mouse button down and drag the red outline in this window till it reaches the required height.
Once all of this is done you should see a bright red box in the main display window that looks like the picture above..
You will note that it also appears in 3 dimensional window (top right)
This is an ideal opportunity to mess around with the camera and see how it works.
( If you cant see anything at the mo, its because your camera is inside the brush you have created and you will have to move it outside of the brush in order to view it correctly )
De-selecting & Re-Selecting brushes
This brings us to de-selecting and re- selecting brushes.
Firstly we are going to de-select the brush you have just created, so hit the "Esc" key now. ( see Figure D1 )

(Figure D1)
You should now see that your brush has now gone all gray in the main "center window" as well as the "left most" and "3D" windows and says "no fog" all over it.
This indicates that you are no longer using it and it wont be affected by anything you do with the mouse in the main screen and frees you up to create other brushes and do other things.
Don't worry you can go back and select the brush again if you want to edit it in the future, simply move your mouse pointer over the brush you want to use in the "3D" view, then hold down the "Shift" key on the keyboard and "Left click" once.
You should see that the brush has become outlined in red again. ( see Figure R1 )
(Figure R1)
You are best using the 3D view to reselect brushes as its far more accurate and easy to use than trying to do it using the main window (center) to do it.
You will now add a texture to the brush you have made, so first select a texture type. I would recommend clicking on "Textures" from the menu bar along the top of the map editor and then selecting "Holodeck_Temple". ( see Figure T1 )

(Figure T1)
Once all the textures have loaded you will see them appear in the shader window "middle right window"
Now re-select your brush again and once it is highlighted in red, "left click" on one of the stone type textures that appear in the shader window. You may have to scroll up or down to select a suitable texture. ( see Figure T2 )

(Figure T2)
You will see your brush take on the texture that you have clicked on and all that is left to do is hit "Esc". The brush you created will become deselected again and you can now clearly see that it has a texture. ( see Figure T3 )

(Figure T3)
The easiest way to create your first room will be to hollow out the shape we have already been working on.

(Figure H1)
Reselect the brush again so that its outlined in red then move your mouse along the icons that appear along the top of the screen till you find the hollow command.
Or do it using the menu commands:
Selection
CSG
Make hollow
( see Figure H1 for what the brush will look like once hollowed out )
Hit the "Esc" key on the keyboard once more and hey presto you have an instant hollow room ready for use.
Now if you move your camera forward and into the shape you have made you will be able to see inside the brush you have created. ( see Figure H2 )

(Figure H2)
Placing lighting and a spawn point
Now we are going to place a light and a spawn point in your room.
Without any sort of light you would be running round in a truly pitch black room with no idea of where you are.
And without the spawn point you wouldn't even get into the room in the first place.
Lighting is easy to use, simply "right click" with the mouse in the main ( center window ) and scroll down to and select "light". ( see Figure L1 )

(Figure L1)
A light will appear like a small diamond in the 3D window. ( see Figure L2 )
(Figure L2)
You can move the light around while its still highlighted in red, by holding down the "left" mouse button and dragging it around the main window. Change the height of the light by dragging the red box in the left most ( height ) window up or down.
Lights work just like brushes, so when you have it positioned where you want it hit "Esc". And if you aren't happy with its position simply re-select it and move it around some more.
You will notice that once you have de-selected the light the entire rooms goes all white and you cant seem to see the texture that you chose for the walls. ( see Figure L3 )

(Figure L3)
Don't worry about this, all its doing is showing that its lighting up the room, if you re-select one of the brushes used for the walls, floor or roof you will see that it still has its texture once you hit "Esc" again.
This is why it is often best to leave lighting your map till its finished, as it can be a real pain having to go around re-selecting everything once you have put in some lights.
It is best to place a lighting roughly half way up a room's wall as this will give a good all round light, you can experiment by having the light very low to the ground, or high up near the ceiling. After all lighting makes up a great part of the atmosphere for a lot of levels.
The only thing I would warn about, is that over doing it with lighting is very silly, you don't need tones and tones of lights, so try to keep lighting to the bare minimum that you can get away with.
You can also change the colour of lighting used, while the light is still selected ( highlighted in red ) simply hit the "K" key on the keyboard and you will get a colour palette from which to choose the colour you want your light to use.
Next we are going to place a spawn point where your character will be generated once a game starts. So "right" click in the main window and then select "info" and "info_player_start". ( see Figure S1 )

(Figure S1)
A small red box 4 x 4 x 8 ( Length x Breadth x Height ) squares should appear, which represents where a player is spawned to when the map is run.
You should move this red box so that it is inside of the room you have just created, and make sure that no part of it is touching the floor, walls or ceiling. ( see Figure S2 )

(Figure S2)
Try and get it so that it is at least three squares up above the ground ( use the height window for this ).
Hit "Esc" button once you are satisfied with its position.
Congratulations
You now have a very basic room with a light source, which can be compiled and played in holomatch mode.
All you have to do now is save your map, firstly make sure that everything in the map is deselected by hitting "Esc" a couple of times. If you don't do this and save it while a brush is still selected it will only save that one brush and not the whole map.
Then click on "File" and "Save" and enter the name of your map as "ctf_box".
Once it has been saved select "BSP" from the drop down menu along the top of the map editor and select "BSP_Fullvis". ( see Figure Com1 )

(Figure Com1)
A dos window will pop up, and with any luck compile your map properly for you. ( see Figure Com2 )

(Figure Com2)
You will know when it has finished as "finished" will appear in the top left hand corner of the DOS window once it has finished compiling properly.
There are some fairly common errors that can occur when making maps, hopefully you wont get any and if you have followed all the instructions so far shouldn't have any problems.
| Error message | Reason |
| Leaked | This is one of the most
common errors, and is usually a result of a hole in one of your walls,
floors or ceilings. It is simple to sort though you will have to cancel
the compile operation.
Once back in the map editor you will see a big red line that will point you to the source of the leak which you will then have to plug using a brush. Just think of each level as a space ship in outer space, if there is a hole that lets anything out into the gray nothing ( that is space of the map editor ), you will get a leak error. |
| Too many leafs per portal | This error occasionally comes up and can be ignored usually |
| Couldn't find map or file | Usually a result of not setting the map editor up correctly, map wont compile in this case |
| Node without a volume | Generally its safe to ignore this one |
| Couldn't find shader | Another one that can usually be ignored safely |
If you are very lucky you wont get any of these errors the first time you go to compile your map.
Now we are going to take the compiled map and change it so that it can be added to the level selection for holomatch.
Close the map editor program and locate the "ctf_box.bsp" file, which the compiling of the map has created.
It should be in:
My Computer
C:
drive
Program Files
Raven
Starr Trek Voyager elite forces
Baseef
Maps
Copy "ctf_box.bsp" and place the copy of it on your desktop for easy access. Its best to do this in case anything goes wrong, at least that way you still have a backup in the "maps" folder.
Now "right" click anywhere on the desktop and create a new folder called "eliteforcemaps" or something similar.
Inside this folder, create 3 new folders called, "levelshots", "maps" and "scripts".
Place the "ctf_box.bsp" file into the maps folder.
Exit this folder and then open the "scripts" folder.
In this one create a new "notepad" file into which you type the following exactly as it appears:
|
{ map "ctf_box" longname "Box" longname_deutsch "Box" longname_francais "Box" fraglimit 25 type "ctf team ffa" recommended 8 }
|
Save the file as "ctf_box.txt"
Then right click on it and rename it as "ctf_box.arena"
Now go back to the main folder on the desktop so that you can see the "scripts" folder and "maps" folder at the same time.
Highlight them both at the same time by dragging a box around them using the mouse.
Both the "scripts" and "maps" folder should now be highlighted.
Right click on "maps" and select "add to zip"
If you don't have WinZip or some other type of Zip program, then you had best get it, as without it you wont be able to do this or distribute your maps properly. (see www.winzip.com)
A WinZip box should pop up, click on "I agree"
An add box should now appear, make sure that nothing is ticked in the "options" box's and that only "include system and hidden files" is ticked in the "Attributes" boxes.
Then type "ctf_box" at the end of the text in the "add to archive" box.
And click on the "add" button.
A WinZip box should pop up indicating that two files: "ctf_box.bsp" and "ctf_box.arena" have been added to the zipped file.
Close this box and close WinZip.
You should now have a zip file called "ctf_box.zip" in the "maps" or "scripts" folder. Locate it and rename this file to "ctf_box.pk3"
Now all you have to do is copy the "ctf_box.pk3" file into your "baseef" folder which can be located in your "star trek elite forces" folder.
There you go, you should now be able to run holomatch and select your new map called "Box" from the list of maps that can be played.
Simply start up holomatch, choose "single player mode", and then "create match", chose "FFA" mode and cycle through the available maps until you see the one called "box" appears.
If everything has gone according to plan you should now be able to play your map.
Don't try to use any bots just yet as you don't have them, and you will have to download another program to allow your map to support them.
If you get everything to work using the above methods you can worry about bots later.
Here are a few extra pointers for good map making
Ok to keep you map size down and make your map run faster you should make sure that any walls, floors, doors etc don't merge into each other.
I.e. the theory that two objects cant occupy the same space at the same time.
Unfortunately this can be done in map making. It is not recommended as it slows down your map and makes it harder to compile.
It is actually very easy to use the map making system to resize brushes so that they are only touching each other and not actually merged together, all it takes is practice.
Try using the "info_player_start" box to correctly gauge how big to make windows and doors.
This saves a lot of hassle and frustration when you find that your player cant fit through a doorway except by crouching down. Or cant see out a window because its to high up or too low down.
This takes a little practice to get used to but is easy once you get the general feel for it.
I do plan to release some more tutorials on how to create ladders, teleports, working doors and switches soon but feel that if you get the basics working that will be enough for now.
Please send all feedback or comments on this tutorial to Fox at NCEF5@Yahoo.com