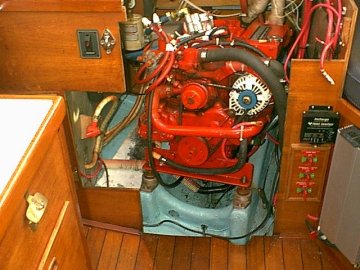
Preparing engine to be pulled
|
rear main seal on the Westerbeke 27 |
I performed my usual oil change on Friday prior to my scheduled winter haulout which was to take place the following Monday. All went well with no unusual events.
On Monday morning I motored the boat approximately 1/2 nautical mile to the haulout area. It was mid afternoon before they were able to lift my boat and block her up for the winter. By the time she was safely blocked it was late in the day so I figured I would winterize all systems the next day. Before leaving the boat I pumped the bilge and then climbed down my ladder and headed for my car. I was shocked when I went behind the boat only to find oily bilge water on the ground immediately below the bilge pump output at the transom.
I immediately went back aboard and looked in the bilge only to find an ugly oily film in the keel sump. Next I pulled the companionway steps and as suspected I found an oily mess under the engine. I checked the oil level and it was down well over a quart from the approximate 20 min of run time since the oil change. Further investigation revealed that there were no leaks around the oil filter, the oil pan or the oil pan gasket. The oil appeared to be coming from the area of the bottom of the bellhousing.
By now it was getting late in the day so I decided to go home and think about this for a while. Once home I became pretty well convinced that I had a blown or leaky rear main seal on the engine. The following day I talked to the owner of a reputable diesel shop and he tended to agree with my diagnosis. This meant that there was no getting around pulling the engine.
After further talks with the deisel shop owner, he recommended that Katie whom he said was an excellent diesel mechanic should do the work. We came to an agreement that I would disconnect everything except the shaft coupling, exhaust system and transmission cable since it would be much easier for his slender 5'3" female mechanic to gain access to those items.
Once the work was done, I would also reconnect all the items that I had originally disconnected. By doing some of this grunt work myself, I could reduce the $75 per hour labor cost for the entire job by a considerabe amount. [We retirees work cheap :-)]
I spent approximately 3 hours disconnecting all electrical connections, throttle cable, motor mounts, fuel feed and return lines, hose to raw water pump and several other items. I also disassembled the teak facing at the front of the engine compartment. Once this was removed I measured and found that the engine would come out with 1/4 inch clearance provided I removed the alternator adjusting arm and then tied the alternator so that it did not protrude past the rest of the engine on the port side.
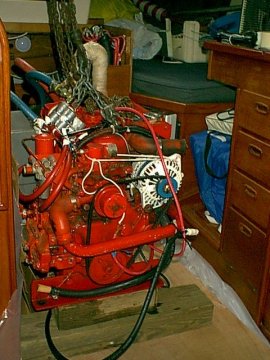
Katie (the female mechanic) arrived to start work on the boat on Mon Jan 16 at 1PM. She covered the cabin sole with a sheet of heavy plastic followed by several layers of canvas painters drop cloths and finally a piece of 3/8" plywood to protect the sole. She then disconnected the shaft and shift cable but the exhaust hose was not coming off easily. I told Katie to just cut it as 18 inches of new hose is much cheaper than the $75 per hour labor to wrestle with this problem. Next we prepared to lift the engine by laying a 4 x 4 oriented in a fore and aft direction on the coachroof either side of the companionway sliding hatch. A piece of 3 inch pipe was then laid across the companionway opening and the chain fall was hung from the pipe with a large loop of heavy stainless cable. A piece of chain was shackled between the lifting rings on the engine and the chain fall was attached to this short length of chain. A half hour later we had the engine out and sitting on wooden blocks on the cabin sole just forward of the galley.

At this point Katie unbolted the transmission adapter plate from the bellhousing. This allowed for removal of the transmission. She next removed the damper plate. It was now 5 PM so work was halted for the day. I felt good about the progress at this point.
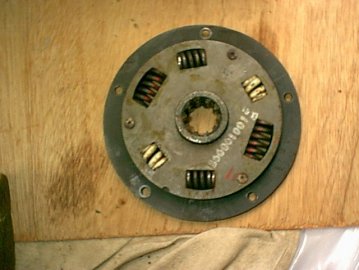
The following day Katie arrived at 8AM and removed the flywheel. You can see evidence of the rear oil seal leaking in the photo below. At this point she had to remove the starter motor and heat exchanger in order to remove the bellhousing. Once the bellhousing was removed she pulled the rear main seal and left for her shop at 10AM to order parts.

While I was awaiting parts and the return of my mechanic, I took this opportunity to thoroughly scrub the engine compartment and repaint it with 2 fresh coats of Petit EasyPoxy (Bikini Blue) as originally used by Sabre when the boat was built.


Copyright 2005-2009 No duplication of any portion of this website without express permission.
Permission may be obtained by e-mailing the webmaster at
earlylight160@yahoo.com.