| |
|
|
 This was a futile attempt at using some of the fabric in my stash. The pink satin that I chose for this gown was actually left over from a costume that I did for a play a few years ago (unpaid, but the stipulation was that I got to keep all of the extra fabric we didn't use). I had about five yards more than was actually needed so it was just enough for skirt and top. I've wanted to make a corseted top for a while now as well as attempt some quilting and beading - so this was a great time to try all of this out. Don't have any idea where I'll wear it but...where's the point in that, anyway? ;) This was a futile attempt at using some of the fabric in my stash. The pink satin that I chose for this gown was actually left over from a costume that I did for a play a few years ago (unpaid, but the stipulation was that I got to keep all of the extra fabric we didn't use). I had about five yards more than was actually needed so it was just enough for skirt and top. I've wanted to make a corseted top for a while now as well as attempt some quilting and beading - so this was a great time to try all of this out. Don't have any idea where I'll wear it but...where's the point in that, anyway? ;)
Skip to finished dress.
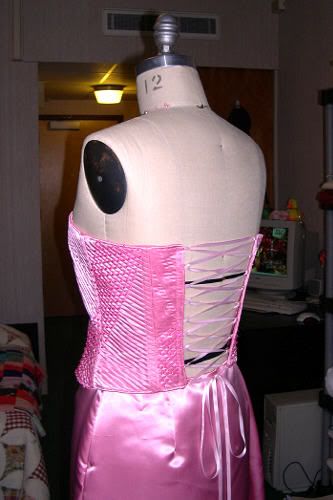
The Corseted Bodice
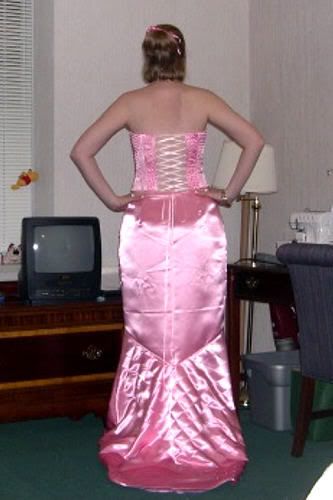
The bodice is a simple princess seamed top. I left a few inches open in the back so there's a fashionable gap to show the ribbon lacing. Sewing the bodice together, I took the pink satin and some sturdy duck cloth and sandwiched these with a layer of cotton batting. These were held temporarily together with basting spray (found in the quilting section of the fabric store) and this lasted long enough while I quilted lines on the bodice pieces with pink thread. After quilting lines all in one direction over the entire piece, I decided to quilt a section of the bodice piece in the other direction, providing some interest.
Once all of the quitling was complete, I sewed the bodice together, using fake flat felled seams which created channels for me to insert plastic boning into. I lined the top in more pink satin (unquilted) and used ribbon loops in the back to run the lacing through. In hindsight, the ribbon is not very sturdy and will probably end up ripping after extended wear. I may end up cutting the loops off and replacing them with lacing rings. After everything was together, I added magenta colored beads to the top, using the squares created by my intersecting quilted lines as a guide. Every other intersection is beaded and then on the next line this is reversed, again for interest. The top actually fits me better than my dressform so the gap in back is not quite so large. 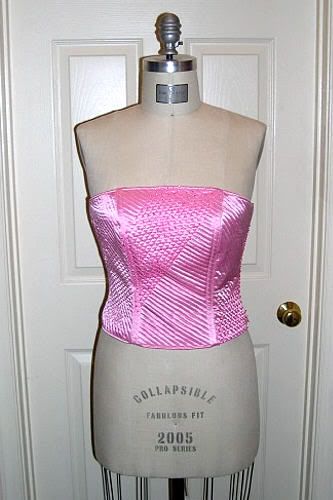
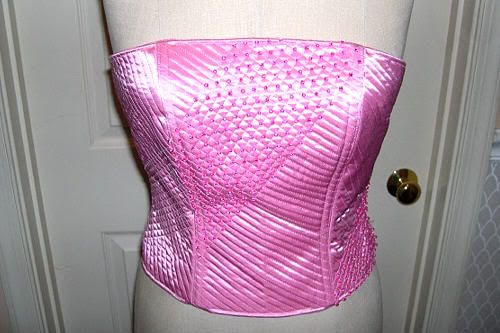
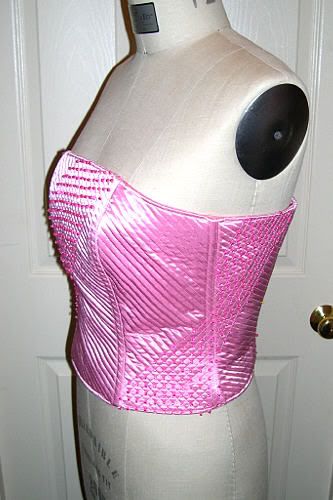
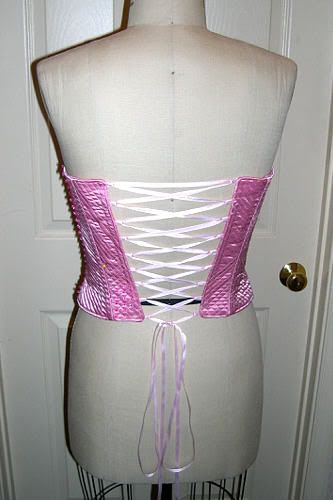
Left to Right: partially beaded: front, close up, side, back; finished top: front, side back [up] [finished original] The Skirt Muslin
My first attempt muslin-ing the skirt ended up with me in my skivvies self-draping it to my body. An adventure in itself, but I'm actually quite proud with how it turned out considering the contortionist act I went through. However, since I now have my shiny new dressform, I properly draped the skirt so it will have the correct amount of ease and such - my first attempt didn't have any, so sitting down was... interesting. In the last picture, you can see how I changed the shape of the train - I didn't like how boxy it looked.
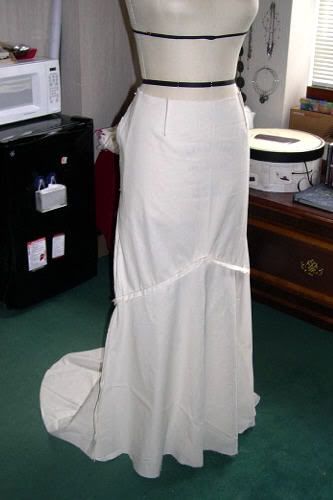
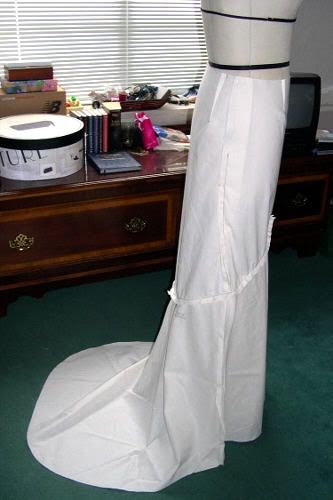
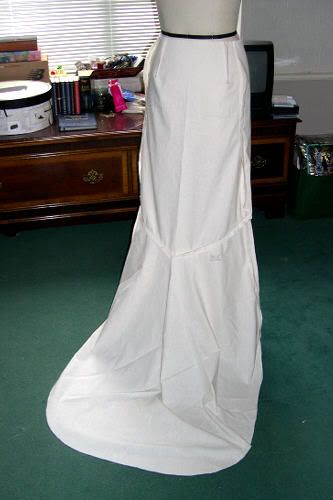
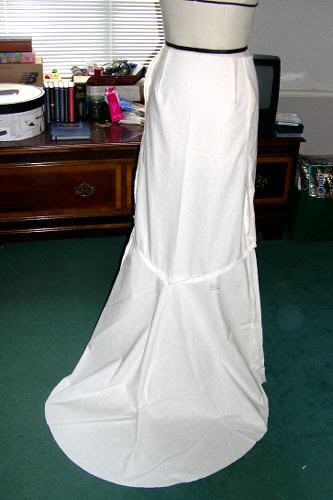
Left to Right: front, side, back, back modified [up] [finished original] The Finished Skirt
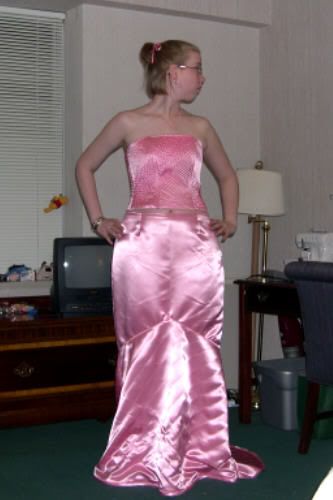
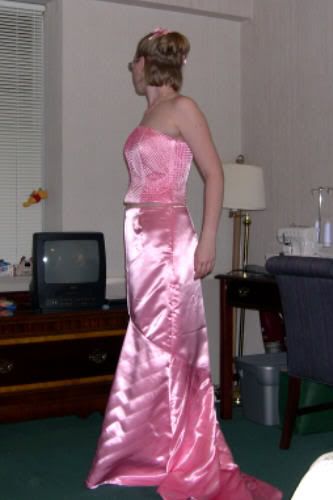
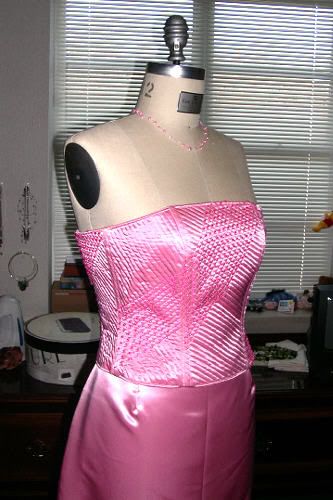
The top portion of the skirt is a simple pencil shape with two darts front and back. There is an invisible side zipper. The top of the skirt is lined though the bottom is not (ran out of pink satin). The bottom portion of the skirt is a fishtail design with much more fullness and drape. The seam connecting the two parts of the skirt comes up high in the front then sweeps low in the back. The bottom section of the skirt is beaded and quilted much like the corseted top, except at a larger scale and without the extra bulk of the batting layer.
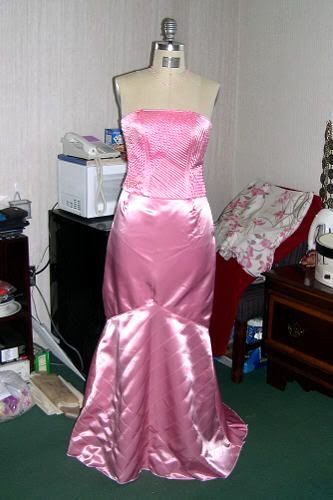
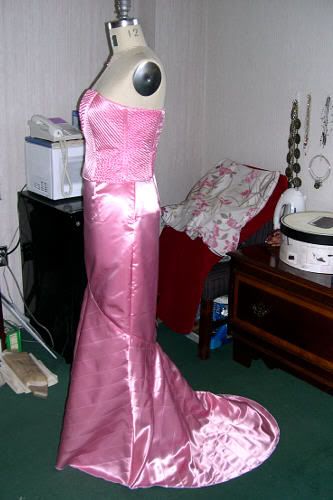
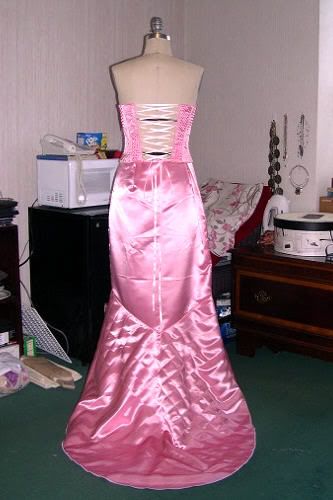
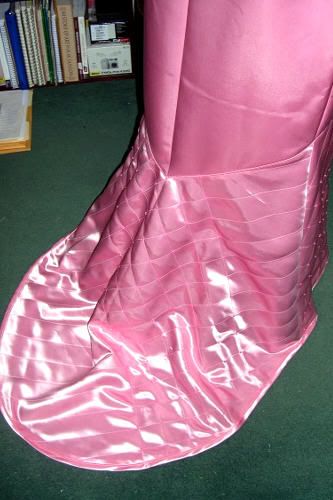
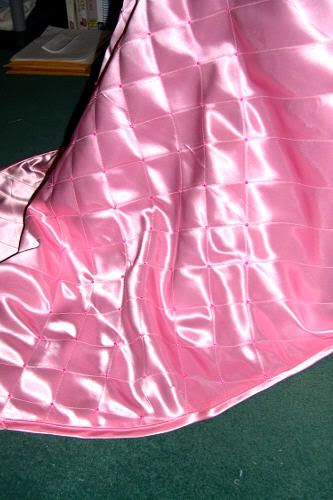
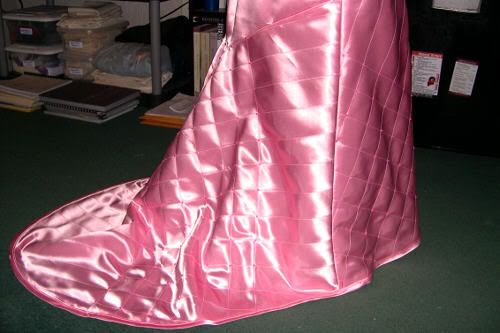
Left to Right: partially beaded: front, side, back; finished: back, side back, side [up] [finished original] The Finished Ensemble |
|
| |